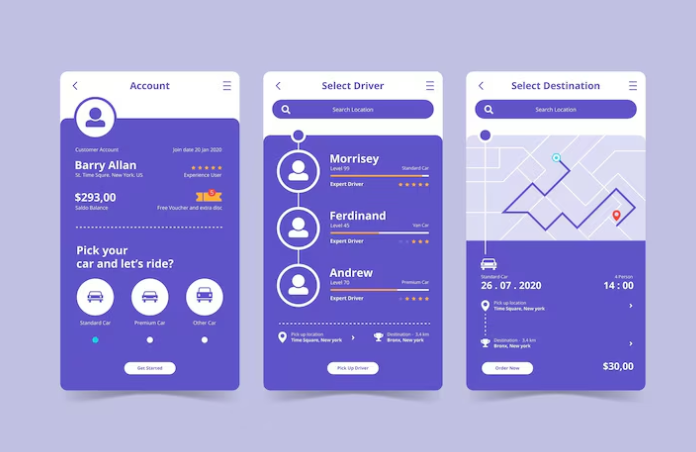
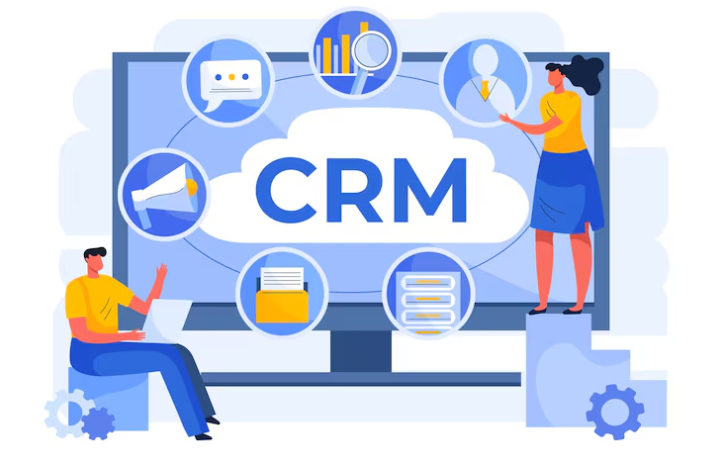
Introduction: Why Bubble and Why a CRM?

Understanding the Power of No-Code Development
No-code development platforms like Bubble represent a paradigm shift in software creation. Gone are the days where building a complex application like a CRM required years of coding experience and significant financial investment. In our experience, this democratization of software development opens doors for entrepreneurs, small businesses, and even individual users to bring their tech visions to life. This is especially true for those with limited or no coding skills, allowing them to focus on the business logic rather than wrestling with syntax.
The power of no-code lies not just in accessibility, but also in speed and agility. Traditional development cycles can stretch for months, even years. With Bubble, prototyping and iteration happen significantly faster. You can build a functional CRM MVP in a fraction of the time. A common mistake we see is underestimating the potential impact of this rapid development cycle. This speed translates to faster market entry, quicker feedback loops, and the ability to adapt and evolve your application based on user needs with unparalleled efficiency. This iterative approach allows you to constantly refine your CRM, ensuring it aligns with your evolving business needs.
Launch Your App Today
Ready to launch? Skip the tech stress. Describe, Build, Launch in three simple steps.
BuildConsider this: a small marketing agency previously relying on spreadsheets now possesses a custom-built CRM designed specifically to track client interactions, manage projects, and streamline communication. This was achieved using Bubble, eliminating the high cost and long wait associated with hiring developers. This example demonstrates how no-code empowers individuals and teams to overcome technological barriers and achieve business objectives using intuitive visual interfaces rather than lines of code, leading to significant cost savings and a much shorter time to market. The result? Increased productivity, enhanced business processes, and a significant competitive advantage.
Why Choose Bubble for Your CRM Project?
Bubble’s visual programming environment makes it an ideal choice for building a CRM, even without extensive coding experience. In our experience, developers familiar with other no-code/low-code platforms find the transition to Bubble intuitive. Its drag-and-drop interface allows for rapid prototyping and iterative development, significantly shortening the time to market compared to traditional coding approaches. This is particularly beneficial for weekend warriors seeking a functional CRM quickly.
Consider the alternative: learning complex programming languages like Python or JavaScript, setting up a server, and managing databases. That’s a significant time investment. Bubble abstracts away much of this complexity, allowing you to focus on the core functionality of your CRM—managing contacts, leads, and sales pipelines. A common mistake we see is underestimating the time saved by using a visual programming platform. For example, implementing a basic contact management system can take weeks using traditional methods, but Bubble can dramatically reduce this timeline, often by half or more.
Furthermore, Bubble’s robust plugin ecosystem expands its functionality exponentially. Need integrations with popular marketing automation tools, payment gateways, or email services? Bubble likely has a plugin for it. This reduces development time even further and eliminates the need for custom integrations, which can be challenging and time-consuming. This flexibility, combined with its scalable architecture—meaning it can adapt as your business grows—makes Bubble a powerful and versatile tool for building your custom CRM application.
Defining Your CRM Needs and Features
Before diving into Bubble, clearly define your CRM’s purpose. What specific pain points will it solve? Are you a freelancer needing to manage client projects and invoices, or a small business needing to track leads and sales? In our experience, starting with a well-defined scope prevents feature creep and keeps your development focused. A common mistake we see is trying to build a fully-fledged Salesforce clone on your first attempt. Focus on the core functionalities you *absolutely* need.
Consider these essential features: contact management, including storing contact details, notes, and communication history; lead management, with options for lead scoring and pipeline visualization; and opportunity tracking, to manage sales deals from initial contact to close. Depending on your business, you might also prioritize reporting and analytics, allowing you to track key metrics like conversion rates and sales revenue. For example, a real estate agent might prioritize contact management and opportunity tracking, while a marketing agency might focus more on lead management and reporting.
Think about the scale. How many contacts will you manage? Will you need integrations with other tools, such as email marketing platforms or payment gateways? These considerations will influence your Bubble app’s architecture and the complexity of its workflow. For instance, if you anticipate thousands of contacts, you’ll need to consider database optimization strategies early on. Remember, iterative development is key; you can always add features later. Start with a Minimum Viable Product (MVP) focusing on your core needs and iterate based on user feedback and business growth.
Setting Up Your Bubble Environment

Creating a Free Bubble Account and Navigating the Interface
Creating your free Bubble account is straightforward. Navigate to bubble.io and click the prominent “Sign Up” button. You’ll be prompted to provide a valid email address and create a strong password. In our experience, choosing a password manager to securely store this information is highly recommended. After verification, you’ll gain access to Bubble’s user-friendly interface.
Once logged in, you’ll land on the Bubble dashboard. This is your central hub for managing all your applications. Familiarize yourself with the key elements: the “Create New App” button (your starting point for any new project), the list of your existing applications (allowing easy access to ongoing projects), and the navigation menu (providing access to user settings, billing information, and the extensive Bubble documentation—a valuable resource we highly recommend exploring). A common mistake we see is users neglecting the documentation; it contains countless tutorials and troubleshooting guides.
Bubble’s interface is intuitive, but understanding its structure is key to efficient app building. The primary components are the Editor (where you’ll design your app‘s visual elements and workflows), the Data tab (for defining your app’s data structures, including fields and relationships), the Workflow tab (where you design the app’s logic and backend functionality), and the Plugins tab (where you can integrate external services and extend the app’s capabilities). Take some time to explore each section; even a brief overview will significantly speed up your learning curve. Think of it like exploring a new city – a quick walk around the main streets will help you find your way around.
Understanding Bubble’s Data Model and Workflow
Bubble’s power lies in its intuitive visual programming, but mastering its data model and workflow is crucial for building a robust CRM. Think of Bubble’s data model as a relational database, where you define different types of information—like Data Types (text, numbers, dates, etc.)—and how they relate to each other. For example, you’ll create a “Customer” data type with fields for name, email, and company. Then, you might link it to a “Deal” data type, establishing a many-to-one relationship (many deals can belong to one customer). In our experience, clearly defining these relationships upfront prevents significant headaches down the line.
Workflows are the engine of your application. They define the actions triggered by user interactions or scheduled events. Each workflow consists of a series of events (e.g., button click, page load) and actions (e.g., creating a new database entry, sending an email). A common mistake we see is trying to build overly complex workflows. Instead, break down complex processes into smaller, manageable steps. For instance, the workflow for adding a new customer might involve separate actions for validating input, creating the customer record, and sending a welcome email. Each step is handled by its own mini-workflow.
Visualizing this is key. Imagine your CRM: A customer submits a form (event). Bubble then validates the data (action 1). If valid, it creates a new “Customer” entry in your database (action 2) and triggers a workflow to automatically send a welcome email (action 3). If invalid, a custom error message appears (action 4). By meticulously designing these workflows, step-by-step, you ensure the efficiency and reliability of your Bubble-built CRM application. Remember to frequently test your workflows and data connections to catch errors early.
Essential Plugins and Resources for CRM App Development
Building a robust CRM on Bubble requires strategic plugin selection. In our experience, neglecting this step often leads to inefficient workflows and a less user-friendly application. Prioritize plugins that handle core CRM functionalities like contact management, lead tracking, and reporting. Don’t overload your app with unnecessary plugins; focus on a few high-quality options that integrate seamlessly.
Consider plugins offering advanced features like email marketing integration (for automated sequences and personalized outreach) and calendar synchronization. A common mistake we see is relying solely on Bubble’s built-in features instead of leveraging powerful plugins to streamline complex processes. For instance, integrating with a dedicated email marketing service like Mailchimp significantly improves campaign management compared to building this functionality from scratch. Remember to carefully review plugin reviews and documentation before integration.
Beyond plugins, access to comprehensive Bubble tutorials and community forums is invaluable. Bubble’s official documentation is a great starting point, but exploring third-party tutorials on YouTube and online forums can offer unique insights and alternative approaches. For example, searching for “Bubble CRM tutorial” reveals a wealth of community-created videos demonstrating specific functionalities and troubleshooting common issues. Engaging with the Bubble community directly can also be helpful; you can often find solutions to specific problems or receive feedback on your design choices. Remember, building a successful CRM is an iterative process – leverage all available resources to optimize your app’s performance and user experience.
Designing Your CRM App’s User Interface (UI)
Building the Database: Designing your data Structures
Before diving into Bubble’s visual interface, meticulously planning your data structure is crucial. This foundational step directly impacts your app’s efficiency and scalability. In our experience, neglecting careful database design leads to messy, hard-to-maintain applications later on. Think of it as building a house: a poor foundation will inevitably cause problems down the line.
Start by identifying your core data points. For a CRM, this might include Contacts (with fields like Name, Email, Phone, Company), Deals (Deal Name, Value, Stage, Close Date), and Tasks (Description, Due Date, Assigned User). Consider relationships between these data types: a Contact might be associated with multiple Deals and Tasks, and vice versa. Bubble uses a flexible system, allowing for one-to-many and many-to-many relationships, crucial for accurate data representation. A common mistake we see is trying to cram too much data into a single data type, leading to inflexible and inefficient data management.
Next, define the data types for each field. Will a phone number be a text field or a dedicated number field? Choosing the correct data type ensures data integrity and enables efficient searching and filtering. For example, using a dedicated date field for “Close Date” allows for easy date-based sorting and filtering within your CRM. Remember, you can always add more fields later, but a well-thought-out initial structure saves considerable development time and headaches. Properly defining your data types from the start will significantly improve the functionality and usability of your final product.
Creating Intuitive User Interface Elements
Designing a user-friendly CRM in Bubble hinges on crafting intuitive UI elements. In our experience, neglecting this crucial step often leads to user frustration and low adoption rates. Prioritize clear visual hierarchy – use size, color, and spacing to guide the user’s eye to the most important information first. For example, a prominent “Add New Contact” button should be clearly differentiated from less critical actions.
A common mistake we see is overcrowding the screen with too many fields at once. Instead, consider using progressive disclosure, revealing details only when needed. For instance, initial contact creation might only require name and email, with additional fields (e.g., company, phone number) appearing after the user clicks a “More Details” button. This approach prevents information overload and improves the overall user experience. Remember to leverage Bubble’s excellent data management capabilities to streamline form submissions and data entry, ultimately improving user satisfaction.
Consider the overall flow of your app. Will users primarily interact with individual contacts, or will they focus more on managing deals or tasks? Tailor your UI to match this workflow. For instance, if managing deals is paramount, ensure that the deal creation and management features are prominently displayed and easily accessible. A well-structured navigation menu, perhaps leveraging Bubble’s built-in navigation elements, is crucial for seamless user experience across different screen sizes and devices. Testing different layout options with your target audience is key to achieving this intuitive design.
Styling and Branding Your CRM App
Your CRM app’s functionality is crucial, but a polished user interface (UI) is equally vital for user adoption and satisfaction. In our experience, neglecting the visual aspects can lead to low engagement, even with a powerful backend. Start by defining your brand’s visual identity. This includes your logo, color palette, and typography. Bubble’s design tools allow for easy implementation; simply upload your logo and select colors that align with your brand guidelines. Consistent branding reinforces professionalism and creates a cohesive user experience.
Consider the psychology of color. For example, blues often evoke trust, while greens suggest growth. A common mistake we see is choosing colors solely based on personal preference without considering their impact on user perception. We recommend researching color psychology to guide your choices and create a visually appealing and effective design. A well-structured layout, with intuitive navigation and clear visual hierarchy (using different font sizes and weights), significantly improves usability. Think about the visual flow; guide the user’s eye naturally through the key features of your CRM.
Finally, test your UI design extensively. Gather feedback from colleagues and potential users. A/B testing different design elements – such as button colors or layout – can reveal subtle but significant improvements in user engagement and conversion rates. Remember, an appealing and user-friendly CRM app is not just about aesthetics; it’s a strategic investment in user experience, boosting productivity and overall satisfaction. Tools like Bubble’s preview mode and user testing features can prove invaluable here.
Implementing Core CRM Features: Step-by-Step
Adding User Authentication and Secure Login
Setting up secure user authentication is crucial for any CRM, and Bubble makes it surprisingly straightforward. In our experience, neglecting robust login security is a common oversight, leaving your client data vulnerable. Begin by navigating to the “Plugins” section of your Bubble editor and searching for a suitable authentication plugin. Many offer varying levels of functionality, including email/password logins, social media integration, and multi-factor authentication (MFA). Consider your needs – a simple email/password system might suffice for smaller projects, while MFA adds an extra layer of security for sensitive data.
Once you’ve chosen and installed a plugin, carefully follow its specific integration instructions. This typically involves connecting your Bubble app to your chosen authentication provider (e.g., Auth0, Firebase). Remember to configure the plugin settings to match your app’s data structure. A common mistake we see is neglecting to properly map the user’s Bubble data fields (like name and email) to the authentication provider’s user profile. This crucial step ensures seamless data synchronization between your CRM and the authentication system.
After the integration, test your login functionality thoroughly. Try creating new user accounts, logging in with various credentials, and testing password reset workflows. For enhanced security, consider implementing features like password strength requirements and account lockout policies. Remember that while Bubble simplifies development, you are still responsible for implementing best security practices. Prioritizing security early on can save significant time and headaches down the line, safeguarding both your users’ data and your application’s reputation.
Managing Contacts and Accounts
Building a robust contact and account management system within your Bubble CRM is crucial. In our experience, effectively linking contacts to accounts is key to efficient data management and reporting. Start by creating two distinct data types: “Contacts” and “Accounts.” The “Contacts” data type should include fields like name, email, phone number, and company. The “Accounts” data type will house information such as company name, industry, address, and website.
A common mistake we see is failing to establish a clear relationship between these data types. To link them, add a “linked accounts” field to your “Contacts” data type, and a “linked contacts” field to your “Accounts” data type. These fields should be of type “List” and allow for multiple linked entries. This structure allows for accurate tracking; a single contact can be associated with multiple accounts and vice-versa, reflecting real-world business scenarios. For instance, a salesperson might be associated with several clients, and each client might have several points of contact. Consider also adding fields for contact roles within an account (e.g., CEO, Marketing Manager) for more granular control.
Finally, remember to design your user interface to reflect this structure. Your Bubble app should provide intuitive ways to create, edit, and search both contacts and accounts, along with clearly displaying their associations. Features like easily adding new contacts directly from an account page, or quickly viewing all associated contacts for a particular account, will enhance user experience. Effective data visualization – perhaps through visual representations of these connections – will further improve workflow and data analysis within your CRM.
Implementing Task Management and Scheduling
First, you’ll need to create a new data type in Bubble for “Tasks.” This data type should include fields like “Task Name” (text), “Due Date” (date/time), “Assigned User” (user), “Status” (dropdown with options like “Open,” “In Progress,” “Completed,” “Delayed”), and “Description” (text). In our experience, a well-structured data type is crucial for efficient task management. A common mistake we see is neglecting to include a status field, leading to difficulty tracking progress.
Next, build the user interface. You’ll want a section to list existing tasks, potentially filtered by assignee or status. Consider using a repeating group to display these tasks, dynamically pulling data from the “Tasks” data type. Each task within the repeating group should display the task name, due date, and status, allowing users to easily see the overview. For scheduling, integrate Bubble’s built-in date/time picker functionality. This allows users to easily input due dates when creating new tasks. Remember to incorporate visual cues like color-coding for statuses (e.g., red for overdue, green for completed) for improved usability.
Finally, implement workflows to manage task creation, updates, and completion. For instance, create a workflow that automatically updates a task’s status when a user marks it as complete. Another helpful addition would be a workflow that sends email notifications to assigned users upon task creation or when a task’s due date approaches. This proactive approach significantly improves team communication and ensures timely task completion. Remember to thoroughly test these workflows to ensure they function as expected across different user scenarios and devices.
Integrating External Services and APIs
Connecting Your CRM to Email Marketing Platforms
Integrating your Bubble CRM with an email marketing platform significantly enhances your workflow, automating communication and streamlining your sales process. A common approach leverages API integrations. Many popular email marketing services, such as Mailchimp, ConvertKit, and ActiveCampaign, offer robust APIs allowing for direct data exchange. This means you can automatically sync new customer data from your Bubble CRM into your email lists, ensuring your marketing efforts remain up-to-date and targeted.
To achieve this, you’ll need to find the relevant API documentation for your chosen email platform. This documentation will outline the necessary API keys and endpoints. In our experience, successfully connecting often involves using Bubble’s plugin ecosystem or building custom workflows using the platform’s built-in API connector. Remember to carefully map the fields between your CRM (e.g., email address, name, purchase history) and your email marketing platform to ensure seamless data transfer. For instance, you might use a “Create Contact” API call in Mailchimp triggered by a new customer record in your Bubble CRM.
A crucial aspect is considering data security and privacy. Avoid sending sensitive data directly through API calls unless the platform employs robust encryption. Always prioritize user privacy and comply with relevant data protection regulations. For example, obtain explicit consent before adding users to your email lists and provide a clear opt-out mechanism. Finally, regularly test your integration to ensure data accuracy and identify any potential issues before they impact your marketing campaigns. Proper testing is crucial; a poorly implemented integration can lead to bounced emails or list hygiene problems, hurting your sender reputation.
Using APIs to Integrate with Payment Gateways or Calendars
Integrating payment gateways and calendars significantly enhances your Bubble CRM’s functionality. For payment processing, popular choices like Stripe and PayPal offer robust APIs. In our experience, Stripe’s API is particularly well-documented and user-friendly, making it a great starting point for Bubble developers. You’ll need to obtain API keys from your chosen provider and then use Bubble’s API Connector plugin to establish the connection. Remember to handle sensitive data securely—a common mistake we see is neglecting to encrypt payment information both in transit and at rest.
Connecting a calendar involves similar steps but with different API endpoints. Popular options include Google Calendar and Calendly. Google Calendar’s API, for example, allows you to create, update, and read calendar events directly within your Bubble application. This functionality is crucial for scheduling appointments and managing client interactions. When choosing an API, consider factors beyond just ease of integration; think about the features offered, pricing models, and the overall reliability of the service. For instance, Calendly might be a better choice if your CRM primarily focuses on appointment scheduling, while Google Calendar provides more comprehensive calendar management.
Successfully integrating these APIs requires careful planning. Before jumping into the code, map out the data flow—how information will travel between Bubble and the external service. Clearly define the user workflows and the actions triggered by API calls. Utilize Bubble’s debugging tools to troubleshoot any issues that arise. By meticulously designing your integration strategy and using Bubble’s robust API connector, you can seamlessly blend these external services into your custom CRM, creating a powerful and efficient tool for managing your business.
Advanced Integrations and Customization Options
Bubble’s flexibility extends beyond basic integrations. For truly customized CRM functionality, you’ll need to leverage advanced features. In our experience, mastering these unlocks significant power. For instance, consider a scenario where you need to integrate with a less common API, perhaps a niche marketing automation tool that doesn’t have a pre-built plugin. You’ll likely need to use Bubble’s API Connector and understand how to handle JSON responses and potentially custom authentication headers. This requires a deeper understanding of both the target API’s documentation and Bubble’s workflow capabilities.
A common mistake we see is underestimating the importance of error handling. Robust error handling is crucial for a stable and user-friendly CRM. Implement thorough checks for failed API calls, invalid data, and network issues. This might involve using Bubble’s built-in error handling mechanisms, or creating custom workflows that handle specific error codes returned from the API. Remember to display informative error messages to the user—avoid cryptic technical jargon and provide helpful guidance on next steps. Consider logging errors to a separate database for debugging and analysis.
Beyond API integrations, explore Bubble’s extensive plugin ecosystem. While many pre-built plugins offer streamlined integrations, customizing existing plugins or building your own custom plugins expands functionality exponentially. For example, integrating a custom payment gateway or creating a sophisticated workflow automation engine using plugins will dramatically enhance your CRM. Remember to thoroughly evaluate third-party plugins before integration; check reviews and documentation to ensure compatibility and security. Always prioritize plugins from reputable developers and familiarize yourself with their support and update policies.
Testing, Debugging, and Deployment
Thorough Testing Procedures
Before launching your Bubble CRM, rigorous testing is paramount. In our experience, neglecting this crucial step often leads to costly post-launch fixes and frustrated users. Start with unit testing, focusing on individual components like data validation and specific workflows. For example, ensure your lead creation process accurately saves all necessary information and triggers the appropriate email notifications. Don’t rely solely on happy-path testing; actively try to break your app by inputting invalid data or simulating edge cases.
Next, move to integration testing. This stage verifies the seamless interaction between different parts of your CRM. A common mistake we see is overlooking the connection between the user interface and the backend database. Thoroughly test data synchronization, ensuring that changes made in one area are reflected accurately throughout the system. Consider using tools like BrowserStack to test your app across different browsers and devices. This helps identify inconsistencies in rendering or functionality based on user environments.
Finally, conduct user acceptance testing (UAT). Invite a small group of representative users to test the CRM in a real-world scenario. Their feedback is invaluable in identifying usability issues or unexpected behaviors you might have missed. Document every bug meticulously, including screenshots and step-by-step reproduction instructions. Prioritize bugs based on their severity and impact, focusing on critical issues that prevent core functionality before tackling minor cosmetic flaws. This iterative testing process, encompassing unit, integration, and UAT, ensures a polished and reliable CRM application ready for your users.
Debugging Common Issues in Bubble Development
Troubleshooting your Bubble CRM can feel overwhelming, but with a systematic approach, you’ll quickly resolve most issues. In our experience, many problems stem from simple oversights. For example, a common mistake we see is neglecting to properly configure data types within your database fields. Ensure your fields accurately reflect the expected input (e.g., text, number, date) to avoid unexpected behavior or errors. Inconsistencies here often lead to data validation issues and broken workflows.
Another frequent source of bugs involves the misapplication of Bubble’s workflows. Remember to meticulously check your conditional logic within each workflow step. A misplaced “If/Then” statement or an incorrect data source reference can propagate errors throughout the application. For instance, referencing a nonexistent field or incorrectly defining a data type within a workflow can cause unexpected crashes or inaccurate results. Always preview your workflows carefully and test them with various inputs before moving to the next step. Consider using Bubble’s debugger to step through workflows line by line, examining the state of variables and data at each point.
Finally, optimizing for performance is crucial, particularly as your CRM grows. A common performance issue we’ve encountered is the inefficient use of database queries. Overly complex queries or unnecessary database calls can significantly slow down your app. Optimize your queries by using appropriate filters and constraints, and consider using pre-loaded data or caching mechanisms for frequently accessed information. This proactive approach to database optimization will ensure a smooth user experience and prevent frustrating performance bottlenecks down the line. Remember to profile your application’s performance regularly using Bubble’s built-in tools.
Deploying Your App and Publishing to the Web
Before deploying, thoroughly test your Bubble CRM app across different devices and browsers. In our experience, neglecting this crucial step often leads to unexpected issues in the live environment. Pay close attention to data integrity, ensuring all features function correctly and data is displayed accurately. A common mistake we see is overlooking edge cases – scenarios with unusual data inputs or user behaviors.
Once testing is complete, navigate to the “Deployment” tab in your Bubble editor. Here, you’ll choose a deployment method. Bubble offers several options, including a free personal domain (your-app.bubbleapps.io) suitable for testing and early releases, or linking a custom domain for a more professional online presence. Remember to select “Deploy to Web” to make your app accessible to the public. Linking your custom domain requires pointing your DNS records to Bubble’s servers; consult your domain registrar’s documentation for specifics. Consider using a reliable hosting provider.
Publishing your app involves making it live and accessible to your users. After deploying, you should review your app’s public URL and test access from an external network to ensure it’s reachable. Remember to announce your app’s launch to your target audience! Effectively promoting your CRM app through targeted marketing, social media, and email campaigns will drive user engagement and growth. Consider A/B testing different promotional approaches to identify the most effective strategies.
Beyond the Basics: Advanced CRM Features and Optimization

Adding Reporting and Analytics Dashboards
Building robust reporting and analytics directly into your Bubble CRM is crucial for actionable insights. A common mistake we see is underestimating the power of visual dashboards. Instead of relying on exporting raw data, leverage Bubble’s capabilities to create dynamic, interactive reports. For instance, you can visualize sales pipeline progress with a dynamic chart that updates in real-time, reflecting deal closures and new opportunities. This provides a much clearer picture than static spreadsheets.
To achieve this, you’ll primarily use Bubble’s built-in charting elements and data visualization features. You’ll need to configure data sources correctly, linking your reports to relevant data types (e.g., deals, contacts, tasks). In our experience, pre-defining the key metrics you want to track is paramount. Consider creating separate dashboards for different user roles: a sales manager might need a high-level overview of team performance, while a sales rep would benefit from a personalized dashboard showing their individual progress and key performance indicators (KPIs). Think carefully about which data points are essential for each user group.
Consider using different chart types to display various data effectively. For example, use bar charts to compare sales performance across different regions or product lines, line charts to show trends over time (e.g., monthly revenue growth), and pie charts to illustrate the distribution of leads across various stages of the sales funnel. Remember, effective data visualization is key—keep it clean, simple, and easy to understand. Bubble’s flexibility allows for extensive customization; take advantage of this to create highly informative and user-friendly dashboards that empower your users with data-driven insights.
Enhancing User Experience with Advanced Features
Boosting user engagement in your Bubble CRM hinges on thoughtful UX design. A common mistake we see is neglecting intuitive navigation. In our experience, users quickly abandon complex systems. Prioritize a clean, uncluttered interface with clear labeling and logical grouping of features. Consider using visual cues, such as color-coding or progress bars, to guide users through workflows. For example, a visually distinct “urgent tasks” section can significantly improve efficiency and reduce user frustration.
Advanced search functionality is crucial for a seamless user experience, especially as your database grows. Instead of a simple text field, implement faceted search, allowing users to filter by multiple criteria (date, status, assigned user, etc.) simultaneously. This significantly speeds up data retrieval, a critical factor in user satisfaction. Remember to also consider implementing autocomplete suggestions to further streamline the search process. This is particularly beneficial for larger datasets or when dealing with complex data fields.
Finally, don’t underestimate the power of customizable dashboards. Allow users to personalize their view, selecting the key metrics and data points most relevant to their roles. This approach significantly increases engagement by providing users with a tailored and efficient workspace. We’ve found that offering pre-built dashboard templates, along with the option for custom creation, provides the best balance between ease of use and personalization. This empowers users to effectively manage their workload and extract meaningful insights from your CRM, fostering a more positive and productive experience.
Scaling Your CRM App for Growth and Long-term Use
Scaling your Bubble CRM for sustained growth requires proactive planning. A common mistake we see is neglecting database optimization early on. As your user base and data volume increase, query speeds will suffer significantly. In our experience, implementing efficient data structures and using Bubble’s advanced features, like preloading data and employing data caching techniques, is crucial for maintaining performance. Regularly review your app’s performance using Bubble’s built-in tools to identify bottlenecks and optimize accordingly. Consider migrating to a more robust database plan as needed.
Beyond database optimization, consider your app’s architecture. A well-structured application built with modularity in mind will scale far more easily. Avoid monolithic workflows; instead, break down complex processes into smaller, reusable components. This allows for easier debugging, updates, and future expansion. For example, separating your contact management from your sales pipeline allows for independent scaling and optimization of each feature. Regularly refactor your code to eliminate redundancy and improve efficiency.
Finally, anticipating future needs is critical for long-term success. Think about potential integrations with other tools, such as marketing automation platforms or payment gateways. Planning for these integrations from the outset makes future expansion smoother. For instance, proactively designing your data model to accommodate future fields ensures seamless integration. Remember, scalability isn’t just about handling more data; it’s about adapting to evolving business needs and maintaining a robust, user-friendly application. By prioritizing these aspects, you’ll ensure your Bubble CRM remains a valuable asset for years to come.
Launch Your App Today
Ready to launch? Skip the tech stress. Describe, Build, Launch in three simple steps.
Build