Getting a website live used to mean paying for a hosting plan, configuring a server, managing SSL certificates, and spending a weekend on deployment setup before a visitor could see a single page. Most free hosting options still produce something: a subdomain URL on a shared server that loads slowly, shows platform branding, and goes down without warning. imagine.bo deploys your website to Vercel’s global edge network and Railway’s auto-scaling backend in a single click, at zero cost on the free plan, with SSL applied automatically and no server configuration required. According to Vercel’s published performance data, sites deployed on their edge network achieve average Time to First Byte under 100 milliseconds for users near an edge node, which covers the majority of global traffic (Vercel, 2024). That is the infrastructure performance you get from imagine.bo’s free deployment, without a hosting bill. This guide covers the complete seven-step process from account creation to live URL. For an overview of the broader deployment and free hosting landscape, this post on deploying a website for free covers the options available in 2025.
TL;DR Deploying a website for free with imagine.bo takes seven steps: create a free account, describe your website in plain English, review the AI-Generated Blueprint, confirm the build, review and refine, click Deploy, and share your live URL. The free plan provides 10 credits per month, public projects, and One-Click Deployment to Vercel with SSL included. No credit card required. No server setup. No hosting configuration. According to W3Techs, over 60% of websites with known hosting use CDN-backed infrastructure (W3Techs, 2025). imagine.bo’s free plan gives you that infrastructure from day one.
What You Get With imagine.bo’s Free Deployment
Before the steps, it helps to be specific about what imagine.bo’s free deployment actually provides. Free is a word that gets used loosely in the hosting industry, often meaning free until a traffic limit is hit, free with heavy branding, or free for features that do not include the ones you actually need.
Launch Your App Today
Ready to launch? Skip the tech stress. Describe, Build, Launch in three simple steps.
Buildimagine.bo’s free plan provides: 10 credits per month for generating and building your website, public projects deployable to a live URL, One-Click Deployment to Vercel’s global edge network, SSL certificates applied automatically on every deployment, mobile-responsive pages generated from your description, and community support. The free plan does not include private projects, credit rollover, or the one-hour pre-launch expert session, which are Pro plan features. But for building and deploying a functional website at zero cost, the free plan delivers production-grade infrastructure.
The deployment targets matter. Vercel handles your frontend with CDN-backed global edge performance. Railway handles your backend and database with automatic scaling. Both are platforms used by production commercial applications, not shared hosting environments with unpredictable downtime. You get the same infrastructure that paying customers use. For a full technical breakdown of how no-code AI applications scale on this infrastructure, this post on scaling no-code AI apps to production covers the architecture in detail.
Step 1: Create Your Free imagine.bo Account
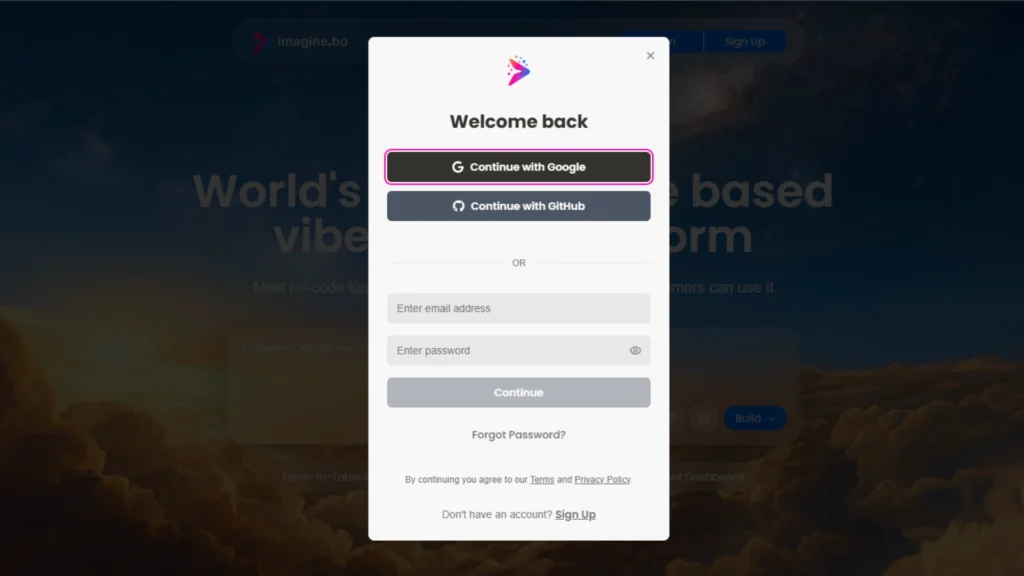
Go to imagine.bo and click the sign-up button. Enter your email address and create a password. No credit card is required. The free plan activates immediately on account creation.
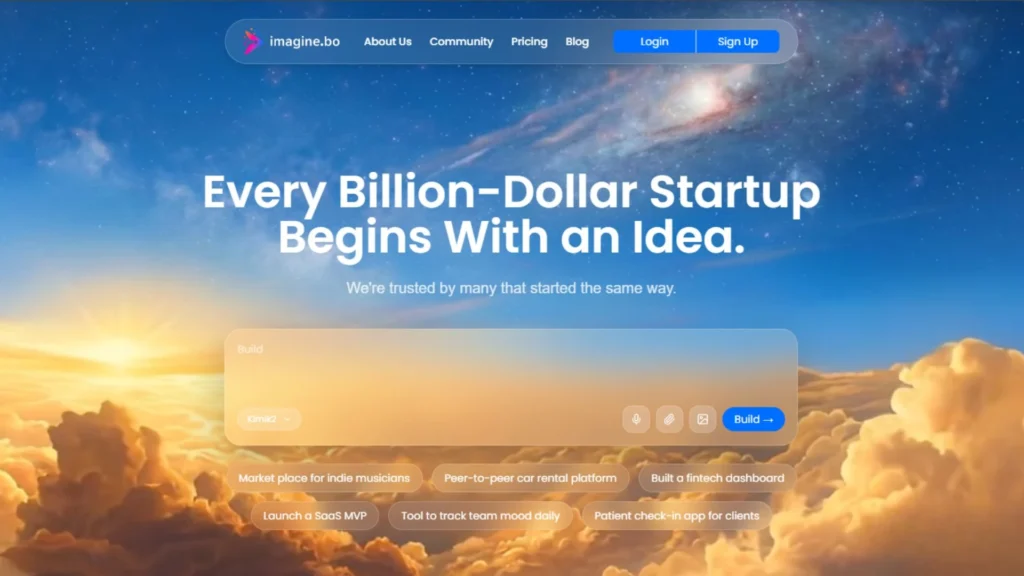
Once inside your workspace, you see the main prompt interface with a text field labelled for your app idea. Your credit balance shows in the navigation. Free accounts start with 10 credits.
The account setup takes under two minutes. The one decision worth making before the next step is choosing what to build. imagine.bo works best for websites that do something: multi-page business sites with contact forms, product portfolios with enquiry flows, service sites with booking systems, or web applications with user accounts and custom workflows. If you need a simple one-page landing page with no backend logic, a tool like Carrd reaches the live URL faster. If you need a complete website or web application with real functionality, imagine.bo produces a more complete result.
Step 2: Describe Your Website in Plain English
The description is the specification. Everything the generated website contains comes from what you describe. A specific description produces a professional result on the first generation. A vague description produces a generic result that requires multiple correction rounds and additional credits.
The four elements that produce the strongest first generation are: who the website is for, what it helps them do, what pages and sections it needs, and what the visual tone should feel like.
A strong description for a freelance photographer’s portfolio site: “Build a portfolio website for a freelance wedding photographer based in London. The site has four pages: Home with a full-width hero image section and a brief introduction, Portfolio with a gallery organised by category: weddings, engagements, and portraits, About with a personal bio and a photo, and Contact with a form collecting name, email, event date, and a message. The design should be elegant and minimal with a black and white colour palette and generous white space. Include a prominent call-to-action on the homepage linking to the Contact page.”
A strong description for a small business service site: “Build a website for a mobile car valeting service in Birmingham. The site has three pages: Home with a hero section and a bullet list of services, Services with three package tiers showing what is included and prices, and Contact with a booking enquiry form collecting name, phone, vehicle type, preferred date, and location. The design should be clean and professional with dark navy and white colours. Include a phone number prominently in the header.”
For a practical walkthrough of what happens when you submit a description like these, this post on making a website with one prompt shows the full generation process from input to output.
The description element that most improves the first-generation quality for business websites is naming the call-to-action explicitly. Websites that include “Include a prominent button on the homepage that says ‘Get a Free Quote’ and links to the Contact page” in their description generate with that button correctly wired and placed. Websites that describe great content but omit CTA details often generate without a clear primary action, which is one of the most common structural weaknesses in first generations and one of the most meaningful for conversion.
Step 3: Review the AI-Generated Blueprint
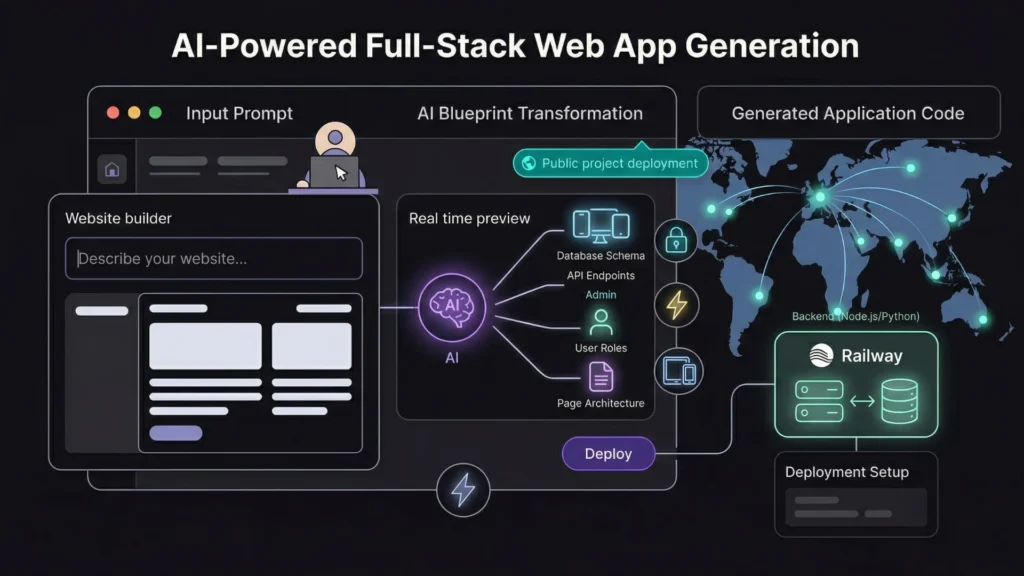
After you submit your description, imagine.bo generates the AI-Generated Blueprint before writing any code. This is the architecture map of what the platform is about to build: the page list, the database schema if applicable, the navigation structure, and the backend configuration.
Reviewing the blueprint before confirming the build takes three to five minutes and is the most important quality step in the process. Every issue caught at this stage costs one follow-up prompt to fix. Every issue missed costs several correction rounds after the build and additional credits.
What to check in the blueprint:
Page completeness: Does every page you described appear in the blueprint? If you described four pages and the blueprint shows three, identify the missing one and add it with a follow-up prompt before confirming.
Navigation structure: Does the menu include links to every page? A common blueprint gap is generating pages that exist in the database but are not reachable through navigation.
Form fields: If you described a contact or booking form, do the fields in the blueprint match what you specified? A form missing a field at this stage will not have it in the generated output.
Visual direction: Does the blueprint reflect the colour palette and tone you described? For most websites the blueprint confirms the layout rather than detailed styling, but any major structural misalignment is worth correcting before the build.
Step 4: Confirm the Build and Wait for Generation
Once the blueprint matches your intent, click to confirm the build. imagine.bo generates the complete website from the blueprint. Depending on the complexity of the site, generation typically takes between two and eight minutes.
During generation you see a progress view showing the stages: analysing your idea, developing the structure, and deploying. You can watch the progress or leave it running and return when it completes.
Credits are consumed at the build confirmation stage, not during description or blueprint review. A standard multi-page business website typically consumes between two and four credits. The free plan’s 10 credits per month are sufficient for building and iterating on a complete website within a single month.
Step 5: Review the Generated Website and Refine
After generation completes, your website is visible in the preview environment. Review it as a visitor would: open each page, check the navigation, test the contact form, and read the content on every section.
Use targeted follow-up prompts to correct anything that does not match your intent. Correction prompts work best when they identify one specific issue at a time.
Effective correction prompt patterns:
For content: “The hero headline on the homepage reads ‘Welcome to our website.’ Change it to ‘London’s Most Trusted Wedding Photographer.'”
For layout: “The portfolio gallery is showing images in a single column. Change it to a three-column grid on desktop and a two-column grid on mobile.”
For missing elements: “The Contact page is missing a success message after the form is submitted. Add a confirmation that says ‘Thank you for your enquiry. We will be in touch within 24 hours.'”
For style: “The button colour is currently grey. Change it to dark navy to match the rest of the design.”
Each correction prompt applies a targeted fix without rebuilding unrelated parts of the website. You can make multiple corrections in sequence before deploying.
Based on imagine.bo’s platform documentation, a typical business website reaches deployment quality after two to four correction prompts following the initial generation. The time from first description to a website ready for deployment is typically three to six hours for a non-technical builder following this sequence, compared to three to eight weeks for an equivalent professionally designed website from a freelance developer. At a freelance rate of $50 to $100 per hour and an estimated twenty to forty hours for a basic business site, the cost difference is $1,000 to $4,000 versus the free plan’s zero cost.
For a detailed guide to the refinement and correction process after first generation, this post on building a no-code web app with imagine.bo covers the full iteration workflow.
Step 6: Click Deploy
When your website is ready, click the Deploy button in the top-right of the imagine.bo interface. One-Click Deployment handles everything that traditionally required DevOps expertise.
What happens behind the scenes in a single click: your frontend is compiled and pushed to Vercel’s global CDN, SSL certificates are provisioned and applied automatically, your backend and database if applicable are deployed to Railway with auto-scaling configured, environment variables are injected securely, and your website is assigned a live URL on the imagine.bo domain.
The deployment process takes between thirty seconds and three minutes depending on site complexity. When it completes, imagine.bo displays your live URL. That URL is immediately accessible to anyone in the world, loading from the CDN edge node closest to each visitor.
According to Vercel’s infrastructure documentation, the average latency from the nearest edge node is under 50 milliseconds for 90% of global users, which means your free imagine.bo deployment loads faster than the majority of websites on shared hosting plans regardless of cost (Vercel, 2024). For the technical context of DevOps and one-click deployment in the no-code era, this post on DevOps and one-click deployment covers what the deployment infrastructure actually provides.
Step 7: Share Your Live URL and Complete These Checks
Before sharing the URL publicly, run through five quick checks that catch the issues most commonly discovered by first visitors rather than by the builder.
Mobile check: Open the live URL on your phone. Confirm the layout renders correctly at mobile screen size. Check that text is readable without zooming, buttons are tappable without precision, and images load without overflow.
Form test: If your website has a contact or booking form, submit a test entry. Confirm the success message appears and, if configured, that the submission reaches the intended destination.
Navigation check: Click every navigation link from every page. Confirm that each page loads correctly and no links return a 404 error.
Speed check: On a standard mobile connection, confirm the homepage loads in under three seconds. If it does not, the most common causes are unoptimised images or unnecessary third-party scripts in the generated code, both of which can be addressed through follow-up prompts.
Content read-through: Read every line of content on every page. AI-generated content is a starting point, not a final draft. Replace any placeholder text, generic descriptions, or content that does not match your specific business.
Once these checks are complete, your website is ready to share. For the broader guide to launching a full web application after the deployment step, this post on launching your idea from concept to live product covers the go-live checklist in detail.
What the Free Plan Covers and When to Upgrade
The free plan is genuinely sufficient for building and deploying a professional website for personal use, freelance portfolios, early-stage business presence, and idea validation. It becomes limiting in three specific situations.
Multiple projects: The free plan supports public projects only. If you want to build a second website for a different purpose and keep them separate and private, the Pro plan’s private projects and higher credit allocation become relevant.
Heavier iteration: If your website requires significant post-launch changes over multiple sessions, the free plan’s 10 credits per month may run short during intensive development weeks. The Pro plan’s 150 credits per month with rollover provides enough capacity for ongoing development without credit top-ups.
Expert support before a major launch: If you are deploying a website for a business where the first impression with real customers matters significantly, the Pro plan’s one-hour expert pre-launch session with a vetted engineer is the most leveraged $25 per month you can spend. An engineer reviewing your deployment configuration, your form routing, and your mobile rendering before your first customer sees it prevents the problems that would otherwise be reported by that customer.
For the full comparison of what each plan provides and how to decide when upgrading makes sense, this post on creating free apps with AI app builders in 2026 covers the free-versus-paid decision in detail.
FAQ
Does the imagine.bo free plan include SSL?
Yes. SSL certificates are applied automatically to every deployment on every plan, including the free plan. There is no SSL configuration required and no certificate renewal to manage. Every imagine.bo website deploys on HTTPS from the first deployment. According to Google’s search documentation, HTTPS is a confirmed ranking signal in Google Search, meaning your free imagine.bo website benefits from this signal from day one without any additional setup (Google, 2024).
What happens to the website if I stop using imagine.bo?
The generated code is clean and exportable. You own it outright. If you stop your imagine.bo subscription or move away from the platform, you can export the codebase and deploy it on any hosting platform independently. You are never locked in to imagine.bo for your website to continue functioning. This is a meaningful difference from platforms like Wix or Squarespace where the website cannot be exported and lives only within the platform’s infrastructure. For a full breakdown of what code ownership means in practice, this post on the benefits of building a no-code web app with imagine.bo covers the code ownership question specifically.
How many websites can I build on the free plan?
The free plan supports building and deploying public projects with 10 credits per month. There is no hard limit on the number of projects, but each generation consumes credits, so the 10 monthly credits determine how much you can build in a given month. A single well-scoped website typically consumes three to six credits from first generation through final refinement. The free plan is sufficient for one complete website per month with credits remaining for minor updates. For more active building, the Lite plan at $6 per month provides 30 credits and the Pro plan at $25 per month provides 150 with rollover.
Can I connect a custom domain to a free imagine.bo website?
Custom domain connection is available on paid plans. The free plan deploys to an imagine.bo subdomain. If you want your website accessible at yourbusiness.com rather than a generated imagine.bo URL, upgrading to the Lite or Pro plan adds custom domain support. The domain itself costs $10 to $15 per year from a registrar separately from the imagine.bo plan.
Conclusion
Seven steps from account creation to live URL: create your free account, describe your website specifically, review the blueprint, confirm the build, refine with targeted correction prompts, deploy with one click, and run the five pre-share checks. The entire process takes three to six hours for most business websites and produces a live, SSL-secured, mobile-responsive website on Vercel’s global edge network at zero cost.
The free plan’s 10 credits per month are enough to build, refine, and deploy one complete website per month with credits remaining for minor updates. No credit card required. No hosting bill. No server configuration. No SSL setup. The infrastructure that previously cost $20 to $100 per month and a weekend of DevOps work is now included in a free plan.
Start today at imagine.bo. Write a specific four-element description of your website, review the blueprint before building, and share your live URL before the day is out. For the broader guide to building any type of website without coding using current tools, this post on building a website without coding in 2025 covers the full range of options and workflows available right now.
Launch Your App Today
Ready to launch? Skip the tech stress. Describe, Build, Launch in three simple steps.
Build