You built the app. Users are interested. Now you need to get paid. “Stripe integration” sounds like a job for an engineer — it’s not. In this guide, you’ll learn exactly how to connect Stripe to a no-code app for one-time payments, subscriptions, and automated payment events, and where the line sits between what you can handle alone and what benefits from a vetted engineer.

Start by reviewing payment gateway integration in no-code apps to understand the full landscape before diving into Stripe specifically.
Launch Your App Today
Ready to launch? Skip the tech stress. Describe, Build, Launch in three simple steps.
BuildTL;DR: You can add Stripe payments to a no-code app without writing a single line of code using Stripe Payment Links, embedded checkout, or platform-native Stripe plugins. Stripe’s hosted checkout reduces checkout abandonment by up to 30% versus self-built forms (Stripe, 2024). For subscription billing and webhook automation, you need one extra layer, but no-code tools handle it cleanly.
What You Need Before Setting Up Stripe
Before you touch the Stripe dashboard, get three things ready: a Stripe account with business verification complete, a clear decision on one-time or recurring payments, and an understanding of how your vibe coding platform handles external scripts or embedded iframes.
Stripe’s business verification typically takes one to two business days for most sole traders and registered companies. During that window, you can still use test mode — build and test your entire checkout flow before a single real card is charged.
Most no-code apps built on platforms like imagine.bo, Bubble, or Webflow either redirect users to an external Stripe-hosted page, or embed a Stripe component directly inside the app’s interface. The redirect method is faster to set up and fully PCI-compliant out of the box. The embedded method feels more polished but requires your platform to support iframe or script injection. Know which category your platform sits in before you start.
Stripe processes payments for more than 100 countries and handles PCI DSS Level 1 compliance on its hosted checkout pages automatically (Stripe, 2024). Founders using hosted payment pages inherit this compliance posture without any additional configuration.
What Stripe Actually Approves: The Account Activation Checklist
Skipping verification is the number-one reason founders hit a wall at the point of going live. Stripe’s “Know Your Customer” (KYC) obligations require specific information before you can process real payments. Have this ready before you start:
Required for activation:
- Legal business name (or your full legal name if operating as a sole proprietor)
- Business address — must be a physical location, not a PO Box
- Tax ID (EIN for US companies, SSN/ITIN for US individuals, or equivalent for your country)
- A bank account in the same country as your Stripe account, matching the business or individual name
- A clear description of what you sell — vague product descriptions trigger manual review
- A public-facing website with a refund policy, terms of service, and contact information
What triggers holds and delays:
- High transaction volume in the first week of a new account
- A sparse or vague website with no clear product description
- Business categories that require additional review (supplements, digital goods, consulting with unclear deliverables)
- Mismatched information between your Stripe application and your website
Before going live, also complete:
- Enable two-factor authentication (2FA) on your Stripe account — passkeys or authenticator apps are recommended over SMS
- Set your statement descriptor so customers recognise charges on their bank statements
- Set up email notifications for successful charges and disputes
- Review Stripe’s Prohibited & Restricted Businesses list to confirm your business is eligible
Accounts with complete business profiles and a public-facing web presence clear review significantly faster than those without (Stripe, 2024). Do this prep work before you start building your checkout flow — not after.
Test Mode vs Live Mode: Beyond Card Numbers
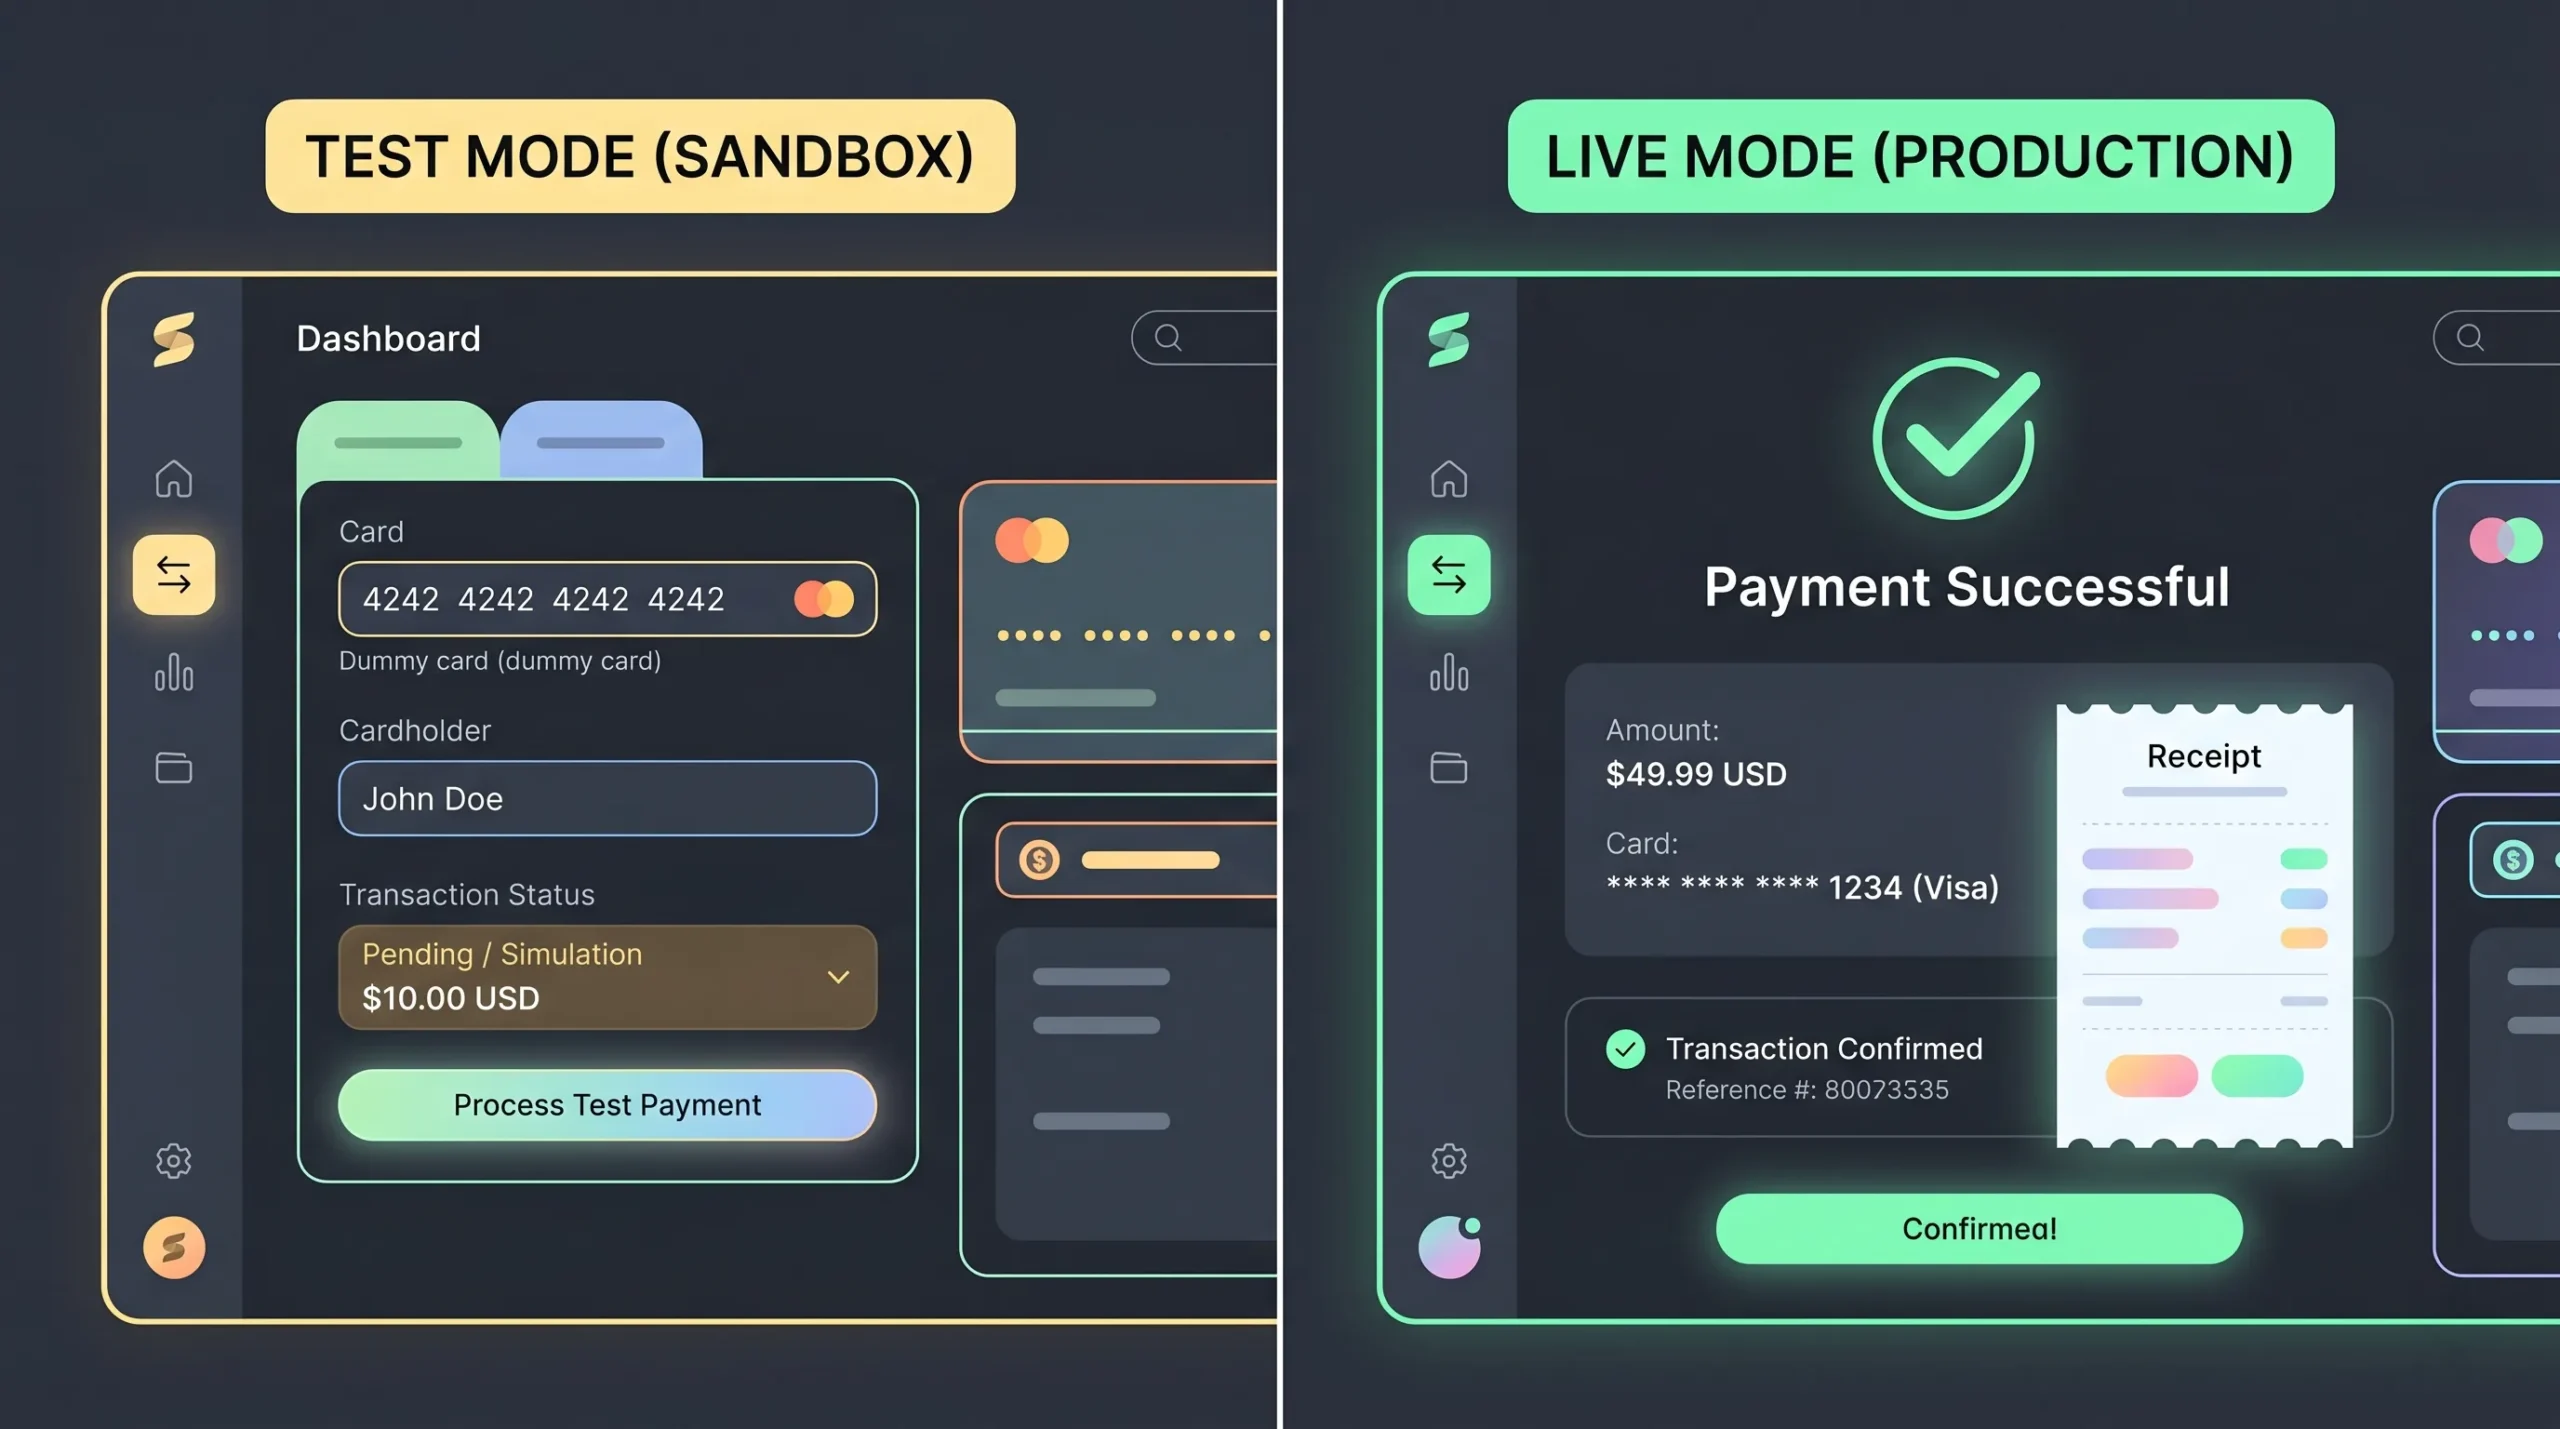
Every Stripe account has two completely separate environments: test mode and live mode. They share no data. Understanding this distinction saves hours of debugging.
What’s different between test and live mode:
| Test Mode | Live Mode | |
|---|---|---|
| API keys | Start with sk_test_ and pk_test_ | Start with sk_live_ and pk_live_ |
| Webhook secrets | Separate whsec_ value | Different whsec_ value — never mix them |
| Card numbers | Fake numbers only (4242 4242 4242 4242) | Real cards, real charges |
| Payouts | No real money moves | Real money to your bank account |
| Webhook events | Generated from test transactions | Generated from real transactions |
| Customer data | Completely separate database | Completely separate database |
The mistake founders make: copying test API keys or test webhook secrets into production. Because test and live modes use different secrets, your webhook signature verification will silently fail if you mix them. When you switch to live mode, update every key and every webhook secret — not just the publishable key.
Always build and test your entire payment flow in test mode first using Stripe’s test card number 4242 4242 4242 4242. Switching to live mode requires completing Stripe business verification. Do not launch a marketing campaign before you confirm live mode is active.
How One-Time Payments Work in a Vibe Coded App
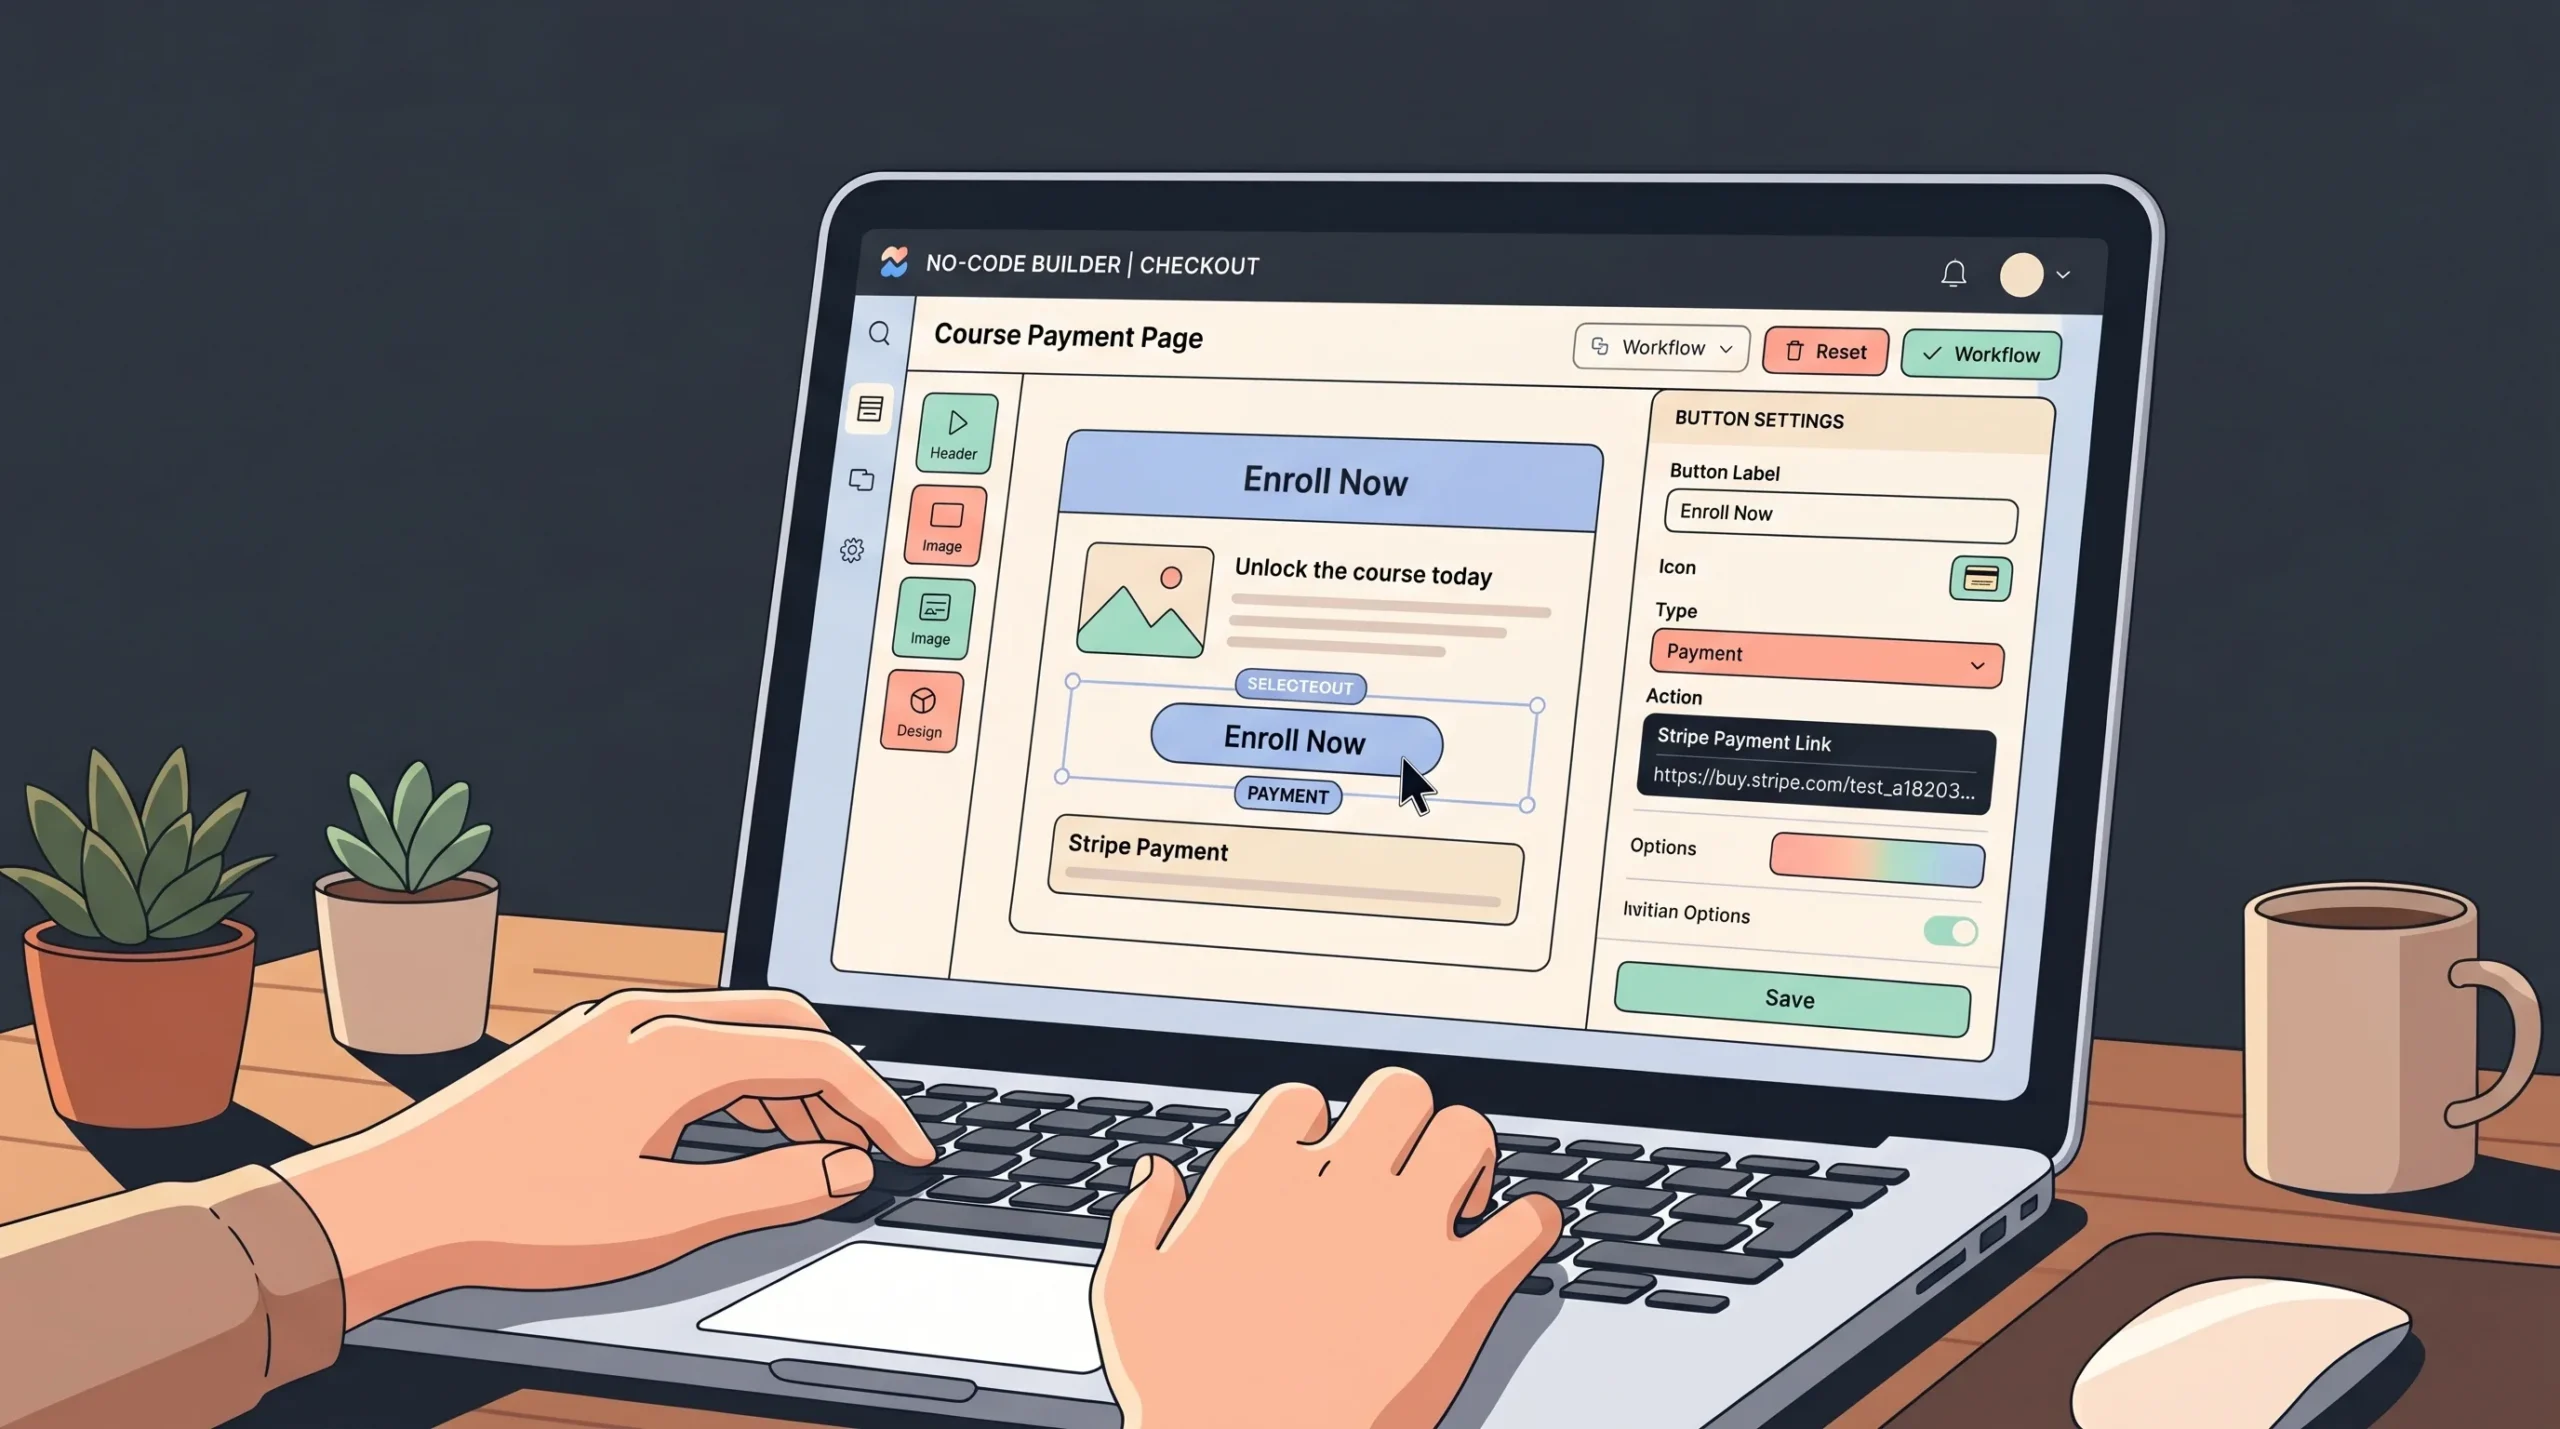
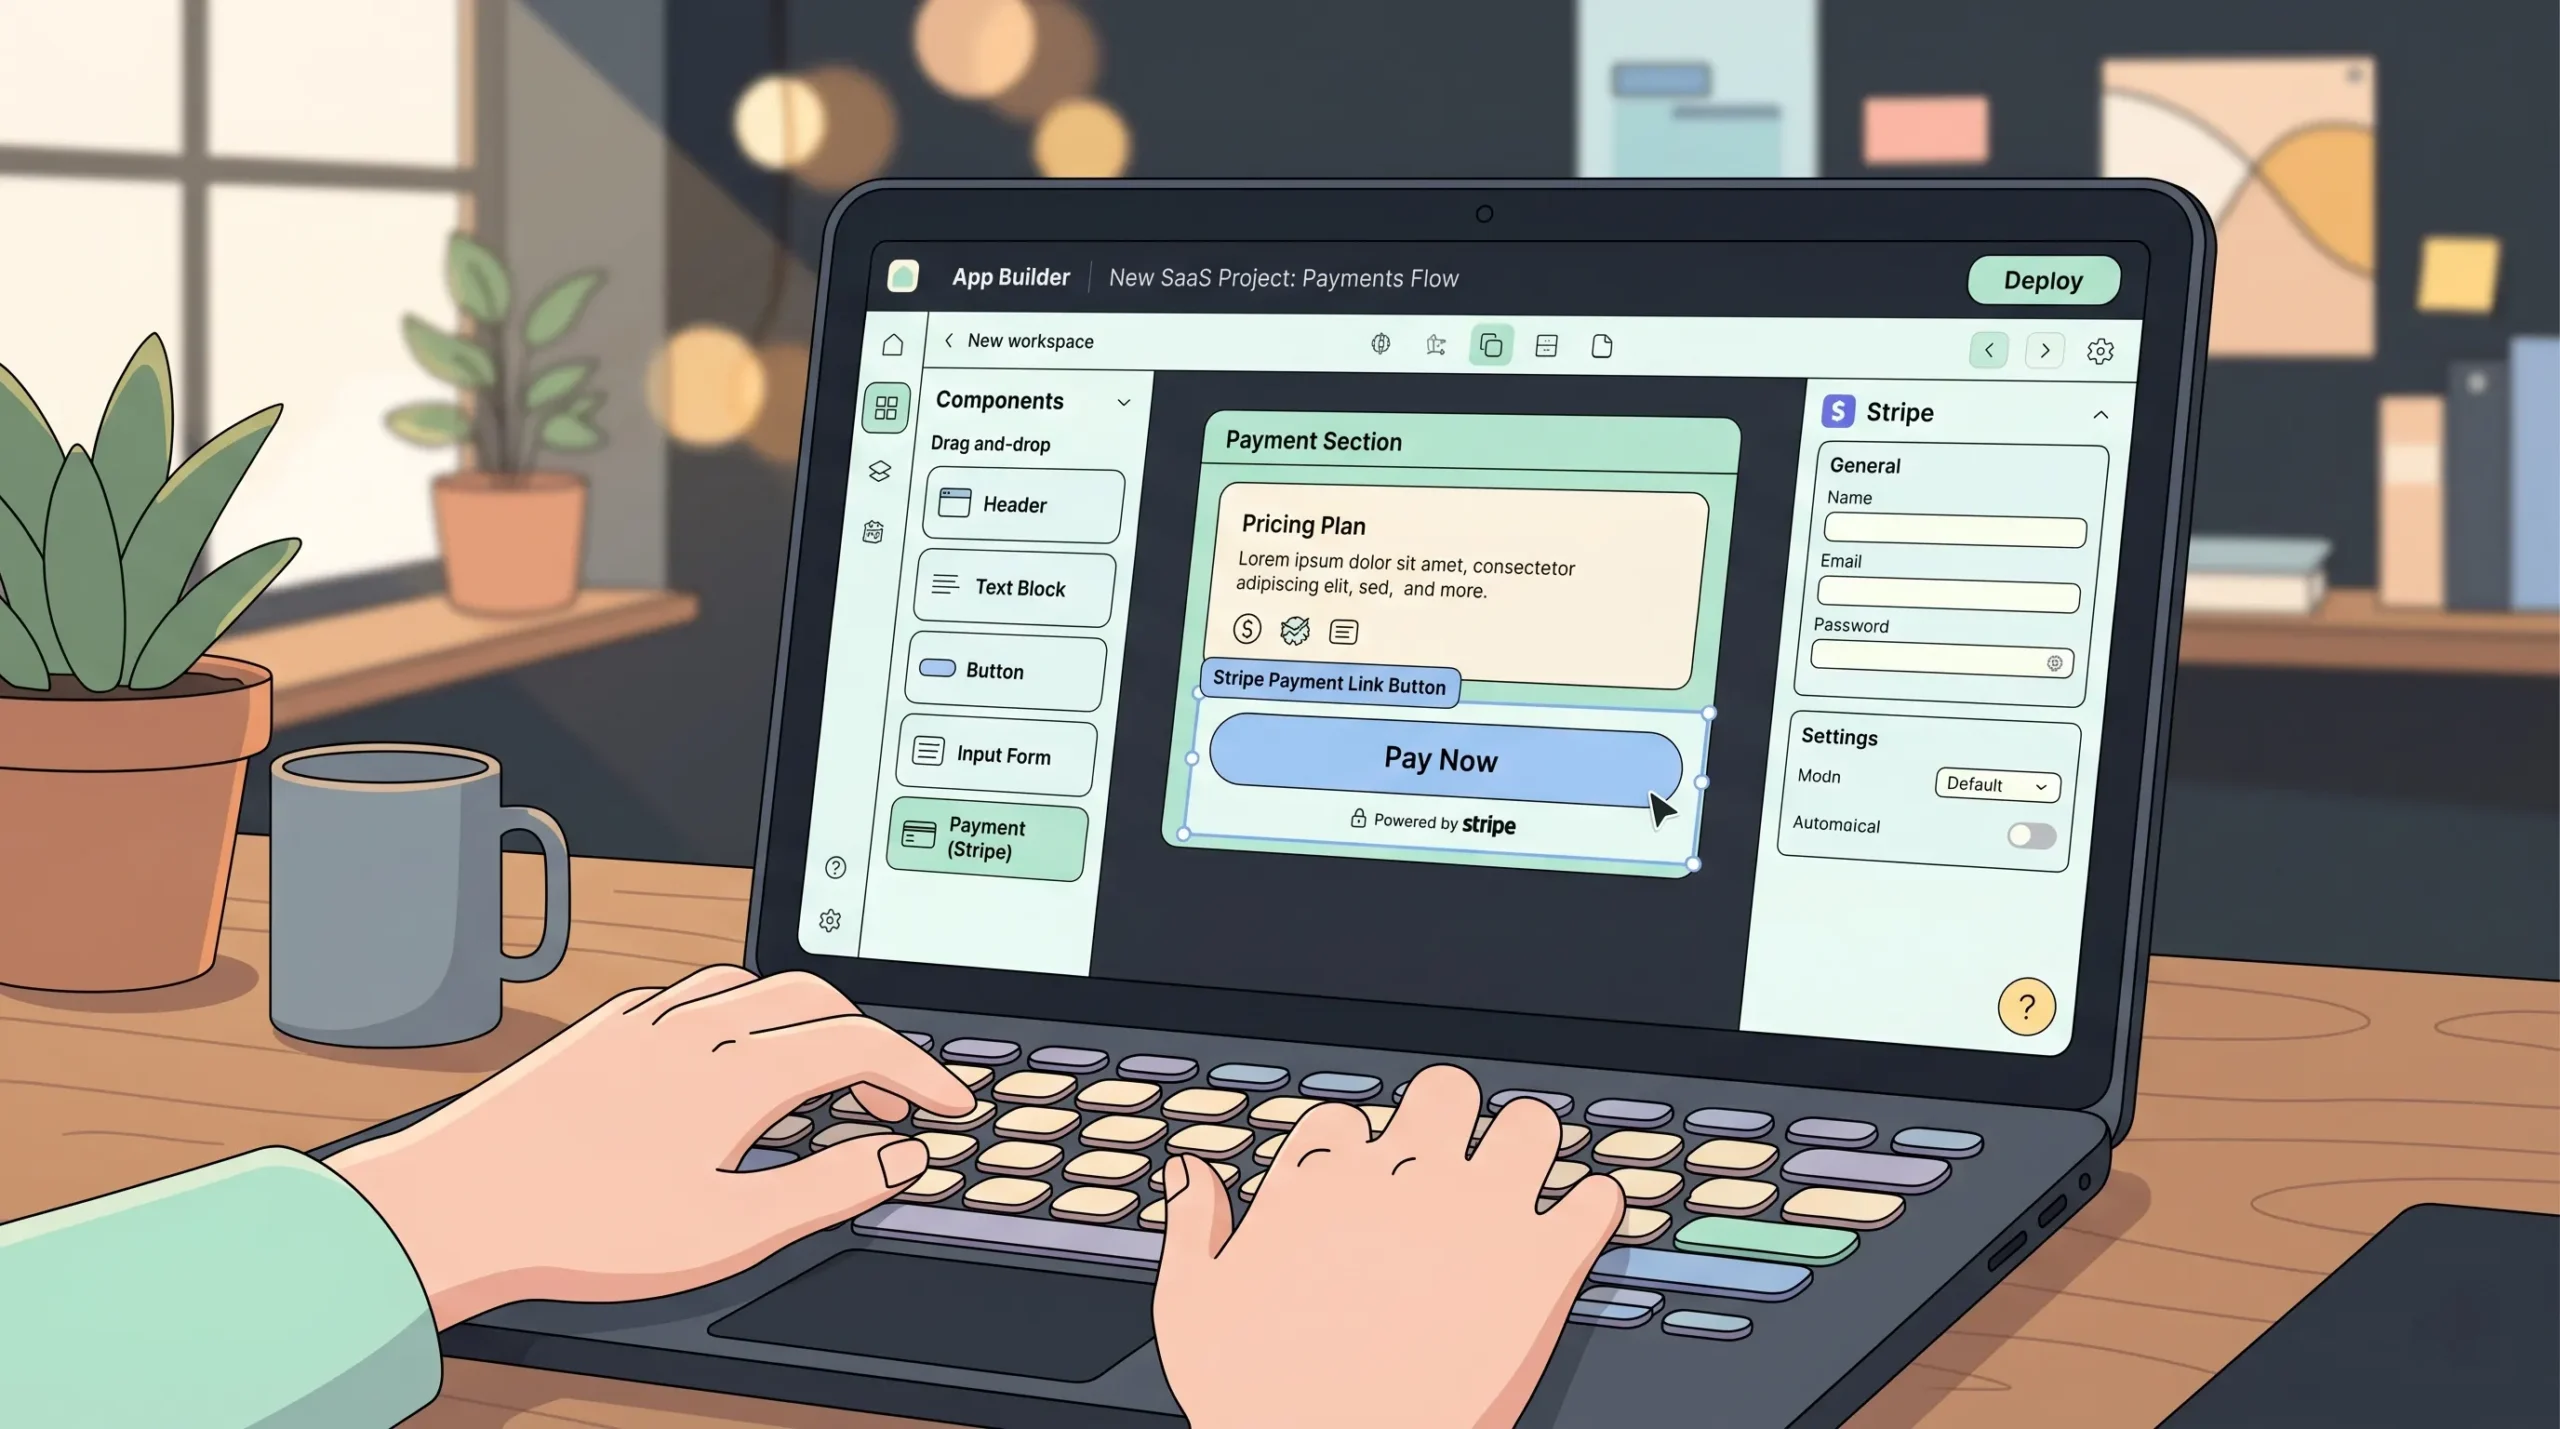
One-time payments are the simplest Stripe integration available. Stripe Payment Links lets you generate a fully functional checkout URL in under five minutes, with no code required.
Step 1: Create your product in Stripe. Go to the Stripe Dashboard, select “Product Catalog,” click “Add product.” Enter the product name, price, and currency. Choose “One time” for the payment type. Adding a product image improves trust at checkout, particularly for digital products.
Step 2: Generate a Payment Link. Navigate to “Payment Links” in the left sidebar and click “New.” Select your product. Configure optional settings: tax collection, promotional codes, shipping address collection, and custom success/cancel redirect URLs. Set the success URL to a confirmation page inside your app so users land back on your platform after paying.
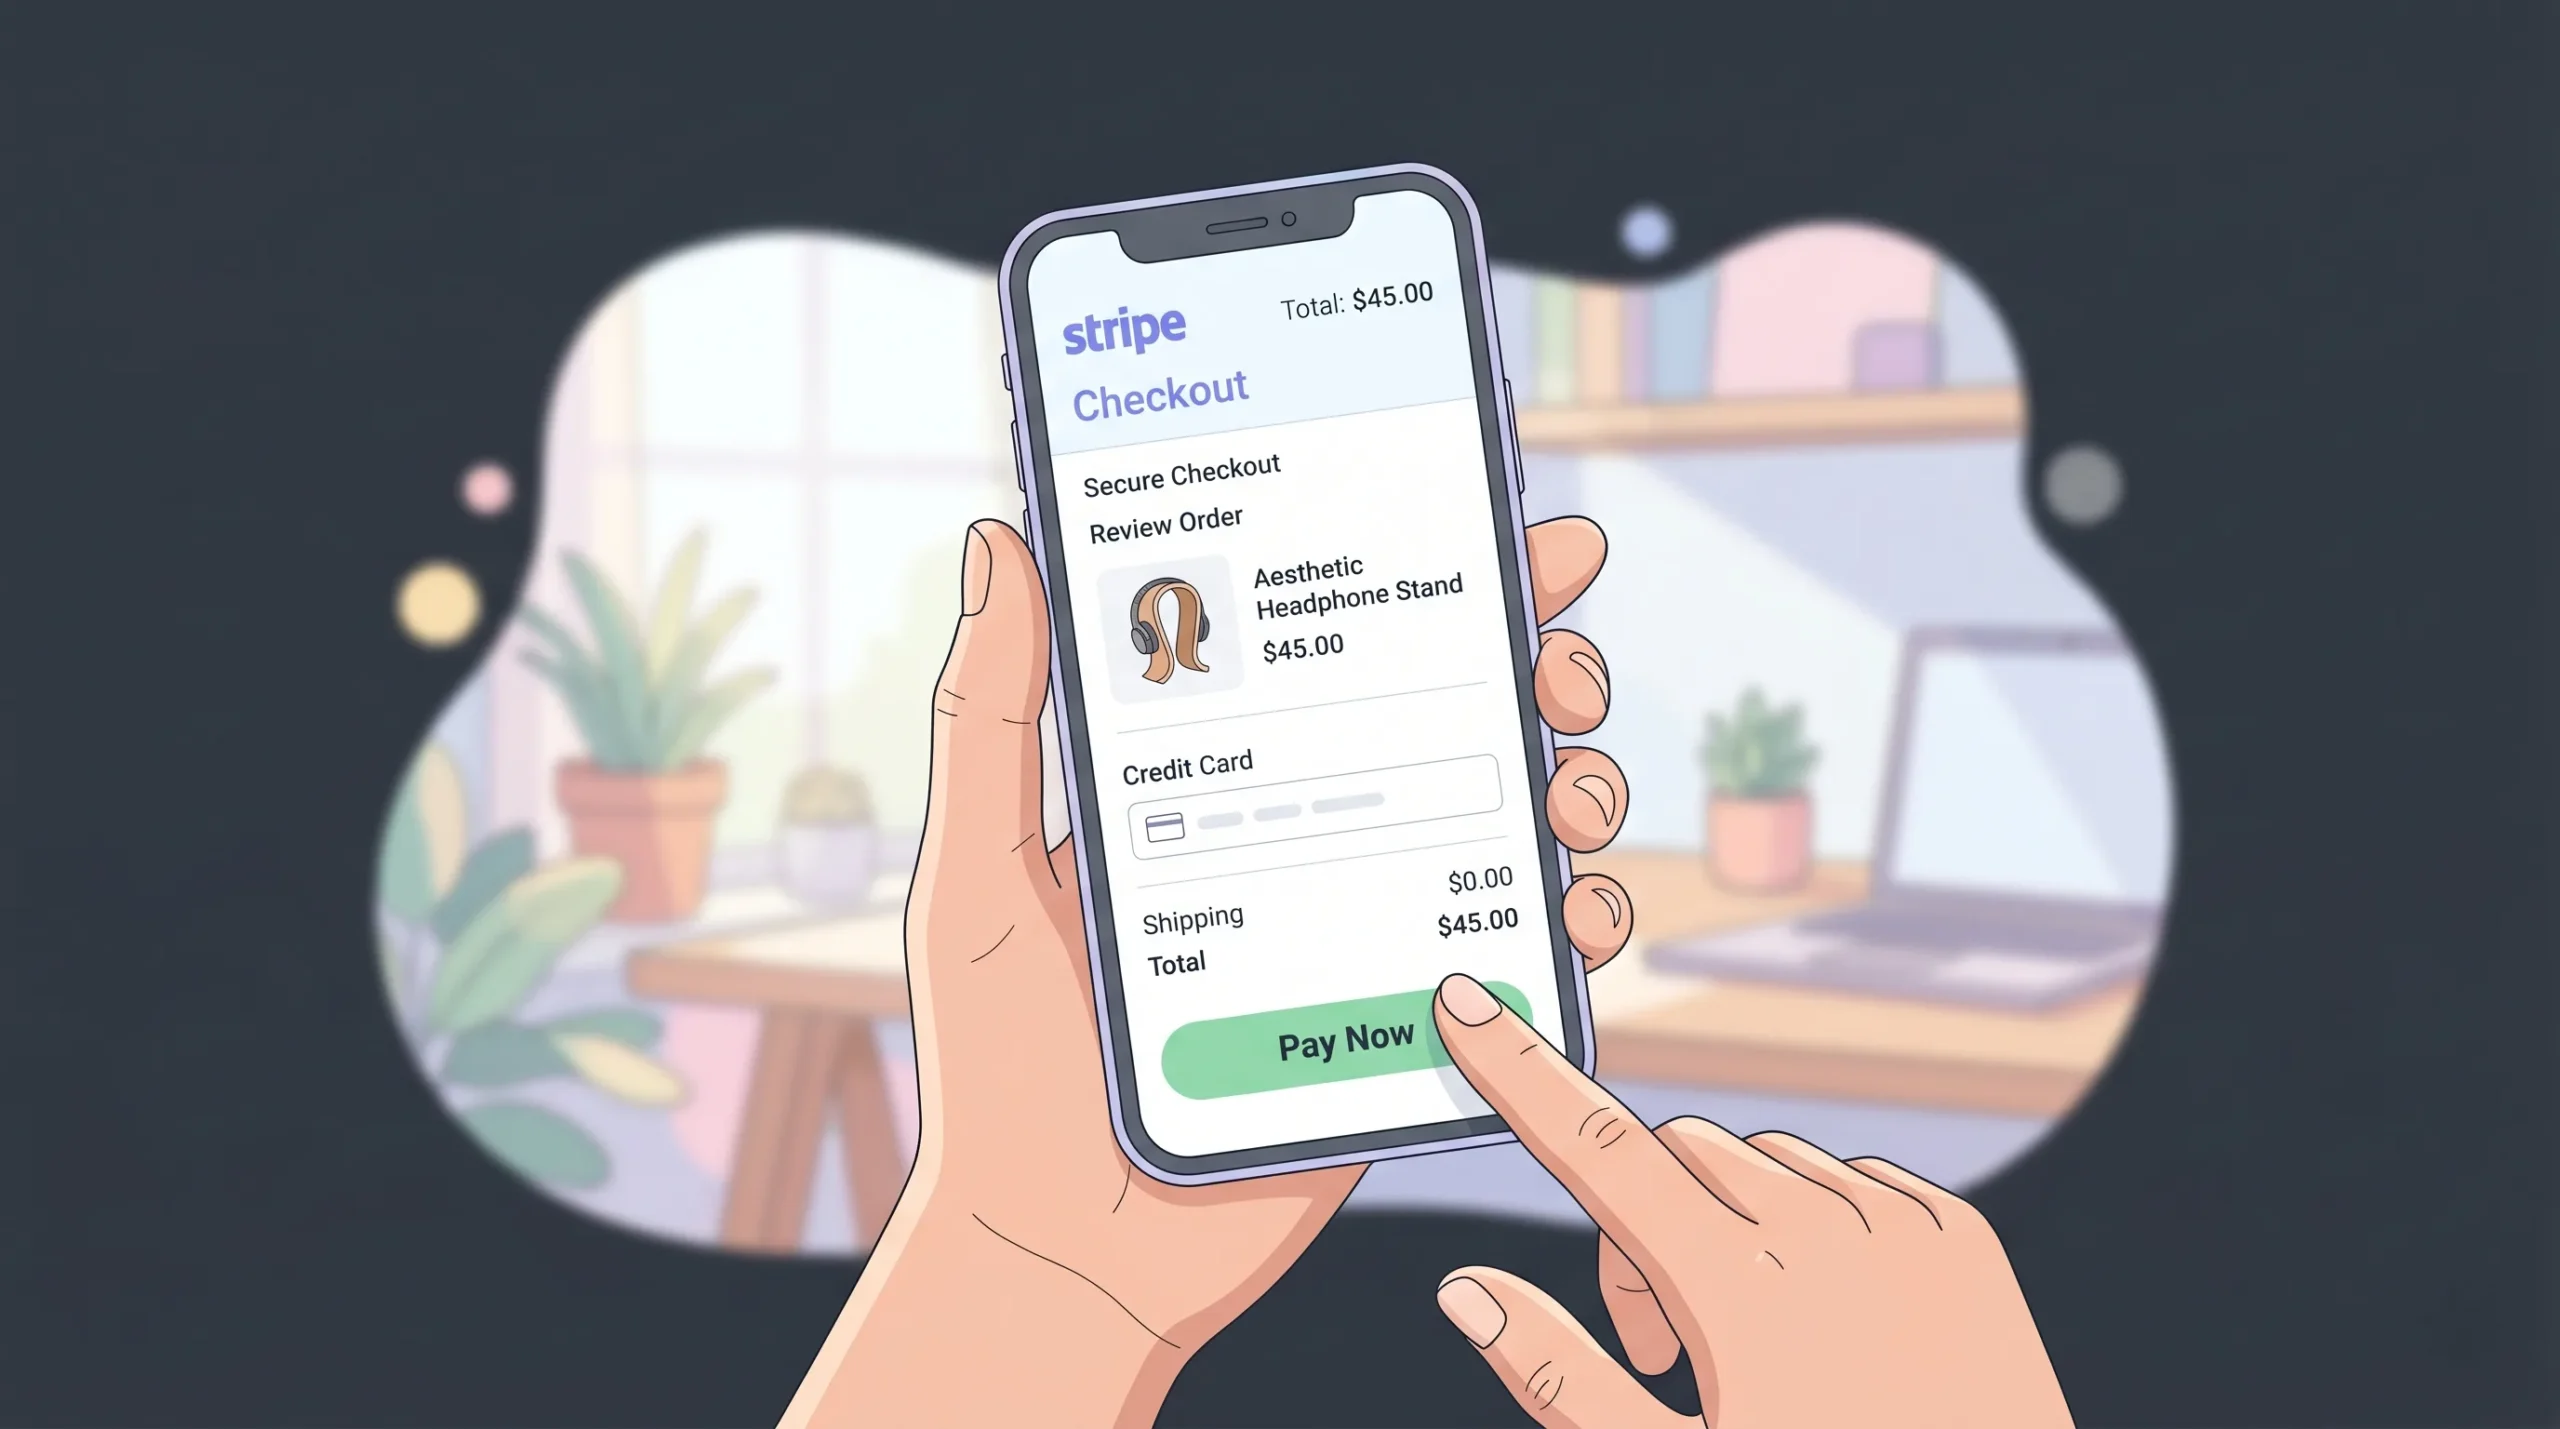
Step 3: Embed it in your vibe coded app. Copy the generated URL. In imagine.bo, paste it into the URL property of any button component. In Webflow, it goes into the button link field. In Softr, attach it to a button action. Your checkout is live.
The detail most tutorials miss: you can append UTM parameters to Stripe Payment Links exactly like any URL. Track which page, email, or ad drove a conversion directly inside Google Analytics without building custom event tracking.
The average documented cart abandonment rate across industries is 70.19% (Baymard Institute, 2024). Stripe’s hosted checkout reduces the friction points that drive abandonment — specifically the 18% of users who abandon because they didn’t trust the site with their card details.
Pair this with insights from how to build an ecommerce app without developers to structure the full purchase flow around your product.
How Stripe Subscriptions Work Without Code
Subscriptions require one additional concept: the billing interval. Stripe handles recurring charge logic automatically once you configure a recurring price, but your app needs to know which users have active subscriptions and adjust access accordingly.

Step 1: Create a recurring product in Stripe. In the Product Catalog, create a product and select “Recurring.” Set the billing period (monthly, annual, or custom). If you offer multiple tiers, create one product per tier with its own recurring price.
Step 2: Set up the Stripe Customer Portal. Go to Settings > Billing > Customer Portal. Enable it and configure self-service actions: updating payment methods, downloading invoices, cancelling subscriptions, switching plans. Enable this before you go live. Without it, every billing change becomes a manual support ticket that doesn’t scale past ten subscribers.
Step 3: Connect subscription status to your app’s user data. Use Zapier or Make to create an automation: Trigger — “Customer subscription created” or “Customer subscription updated” in Stripe. Action — Update the user record in your app’s database with subscription status and plan tier.
In imagine.bo, the Describe-to-Build feature can generate the user role and subscription status fields in your database schema as part of the initial build. Describe your subscription model in plain English, and the AI-Generated Blueprint sets up the data structure. Then connect the Stripe event to update those fields via automation.
Subscription-based businesses grew revenues roughly 4.6 times faster than S&P 500 companies over the past decade (Zuora, 2023). Building subscription billing correctly from the start is worth the extra setup time.
For the complete picture on launching a subscription product, how to launch a subscription-based app without developers walks through pricing strategy, trial periods, and churn reduction alongside the technical setup.
Webhooks: The Real-Time Sync That Keeps Your App Accurate
Webhooks are real-time notifications Stripe sends to your app when something happens: a payment succeeds, a subscription renews, a card is declined. They keep your app’s data in sync with Stripe’s data.
If your app grants access to gated content, activates a user account, sends a confirmation email, or updates any internal record based on payment status — you need webhook-driven automation. If you’re selling a single digital product with a static download link and no account system, you can skip them initially.

Setting up webhooks without code:
Step 1: In your automation tool (Zapier or Make), create a new scenario and select “Webhook” as the trigger. Copy the webhook URL the tool provides.
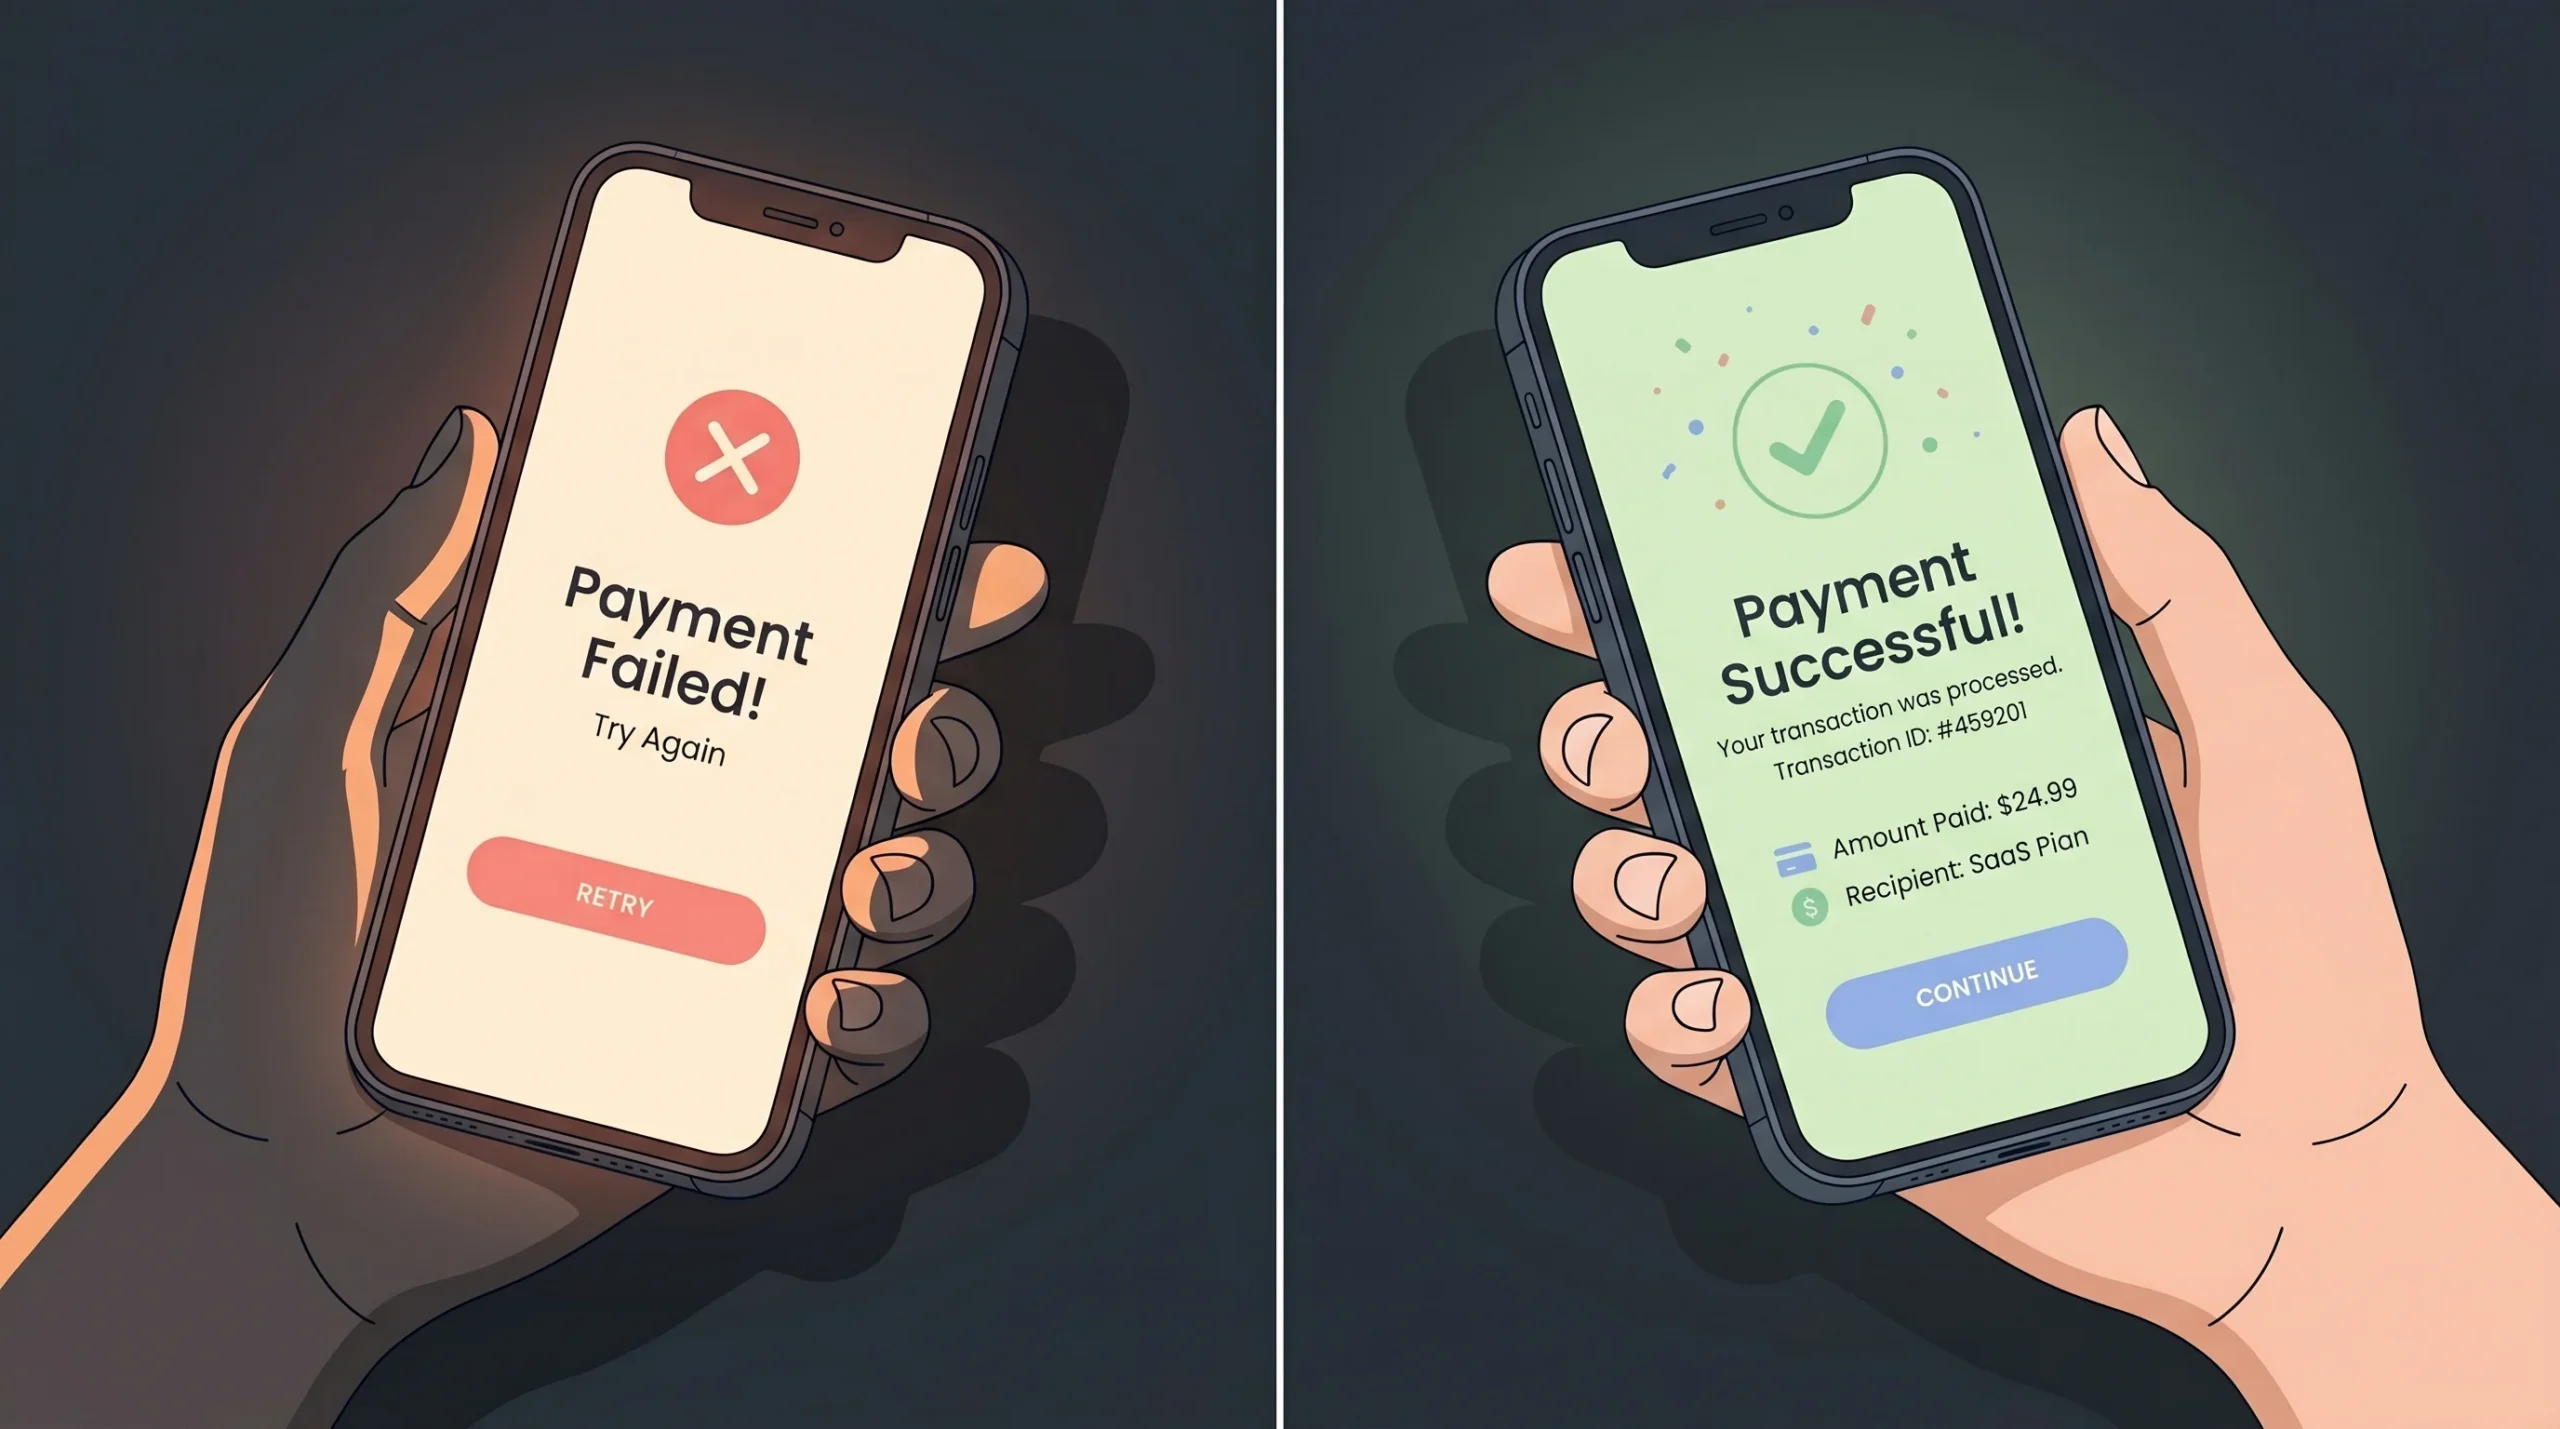
Step 2: In your Stripe Dashboard, go to Developers > Webhooks > Add endpoint. Paste the webhook URL. Select the events you want to listen to. Start with: payment_intent.succeeded, customer.subscription.created, customer.subscription.deleted, and invoice.payment_failed.
Step 3: Define what happens when each event arrives. For payment_intent.succeeded, update a user’s account status. For invoice.payment_failed, trigger an automated email asking the user to update their payment method.
For a deeper look at what goes wrong when payments fail, common Stripe payment integration challenges explained covers the most frequent failure modes.
Webhook Verification: The Step Everyone Skips
Every webhook endpoint you create is a publicly accessible URL. Without verification, anyone who discovers that URL can send fake events to it — a forged payment_intent.succeeded event could grant access to someone who never paid.
Stripe signs every webhook it sends by including a cryptographic signature in the Stripe-Signature header. Verification means checking that signature before acting on the event.
If you’re using Zapier or Make: these platforms handle signature verification automatically when you use their native Stripe triggers. You don’t need to do anything extra — but you should know that it’s happening behind the scenes, and it’s the reason you should use the official Stripe trigger rather than a generic webhook trigger.
If you’re building a custom endpoint (or your engineer is): verification is non-negotiable. Here’s what it requires:
- Retrieve your endpoint’s signing secret. In the Stripe Dashboard, go to Developers > Webhooks, click your endpoint, and reveal the signing secret. It starts with
whsec_. Store it as an environment variable — never hardcode it in your source code. - Verify the signature on every incoming request using Stripe’s official SDK (available for Node.js, Python, Ruby, PHP, Go, Java, and .NET). The SDK compares the signature header against a hash of the raw request body using your signing secret.
- Use the raw request body. This is the most common source of verification failures. Many web frameworks automatically parse JSON before your webhook handler runs, which changes the body and breaks the signature check. Make sure your webhook route receives the raw, unparsed request body.
- Stripe has a default tolerance of five minutes between the event timestamp and the current time. This protects against replay attacks — where someone intercepts a valid event and resends it later. Don’t disable this check.
If you’re using imagine.bo’s Hire a Human feature to get a developer to build a custom webhook endpoint, include “webhook signature verification” explicitly in the task description. It’s the single most important security step in any Stripe integration.
Idempotency: What Happens When a Webhook Fires Twice
Stripe uses at-least-once delivery for webhooks. That means the same event can arrive at your endpoint more than once — due to network issues, retries after timeouts, or Stripe’s own retry logic. If your endpoint processes the same event twice, the user might get duplicate access grants, duplicate emails, or duplicate database records.
The fix is called idempotency: making your webhook handler safe to run multiple times with the same event without changing the result.

If you’re using Zapier or Make:
Add a “lookup” step at the start of your automation. Before processing, check whether the Stripe event ID (every event has a unique id field) already exists in your database. If it does, skip. If it doesn’t, process the event and record the ID.
In Zapier, this looks like a “Find Record” step before your “Update Record” step. In Make, use a “Search” module. It adds thirty seconds to set up and prevents the most common class of payment bugs.
If you’re building a custom endpoint:
Store every processed event ID in your database with a unique constraint. Before running your business logic, check whether that event ID already exists. If it does, return a 200 response and stop. If it doesn’t, process the event and insert the ID.
The key principle: always return a 200 status code quickly (before any complex logic runs), then process the event asynchronously. Stripe will retry if it doesn’t get a 2xx response within 20 seconds — and if your handler is slow, those retries create the exact duplicates you’re trying to prevent.
Stripe Smart Retries: How to Actually Enable It
Involuntary churn — subscriptions lost because of failed payments rather than user cancellation — accounts for 20 to 40% of total churn for SaaS businesses (Stripe, 2024). Smart Retries is Stripe’s ML-powered feature that automatically retries failed charges at the statistically best times to recover revenue.
How to enable it:
- Go to your Stripe Dashboard
- Navigate to Billing > Revenue Recovery > Retries
- Select “Use Smart Retries” (this is the default, but verify it’s active)
- Set the retry policy: Stripe recommends 8 retries within 2 weeks as the default
- Choose what happens after all retries fail: cancel the subscription, mark it as unpaid, or leave it past-due
What Smart Retries actually does behind the scenes: Stripe’s ML model analyses signals like the time of day, the type of payment method, recent device activity on that card, and historical success patterns across Stripe’s entire network to pick the optimal retry timing. It’s significantly more effective than retrying on a fixed schedule (e.g., every 3 days).
Also enable these companion features while you’re in the Revenue Recovery settings:
- Automated failed payment emails — Stripe sends customers a direct link to update their payment method when a charge fails
- Card account updater — Stripe automatically updates expired or replaced card numbers with the customer’s new card details from the card network
Setting up the invoice.payment_failed webhook and connecting it to an automated re-engagement email is one of the highest-ROI actions a subscription app founder can take — and it takes under an hour to configure in Make or Zapier.
When to Hire a Human Instead of Doing It Yourself
Most Stripe integrations are genuinely self-serviceable in a vibe coding context. There are three situations where bringing in a vetted engineer is the right call — not because you can’t technically do it, but because the risk of getting it wrong outweighs the time savings.

Marketplace payments with split payouts. Stripe Connect requires understanding platform fees, account types (Express vs Standard vs Custom), payout schedules, and tax reporting obligations. The edge cases are numerous.
High-volume PCI-sensitive environments. If your business requires storing card details on your own servers or processing in regulated industries like healthcare billing, you need someone who understands PCI scope.
Complex subscription logic. Seat-based billing, usage-based billing, free trial periods with automatic conversion, and plan upgrades with prorated charges all have gotchas that appear in production, not in test mode.
imagine.bo’s Hire a Human feature lets you assign these specific tasks to vetted engineers directly from your dashboard. You stay inside the same workflow where you built the app. The engineer handles the scoped task and hands it back. No separate hiring process, no freelance contract negotiations, no context-switching across tools.
Read why Hire a Human is the AI app builder feature you actually need to understand how the handoff works in practice and when it makes economic sense.
73% of small business owners reported that payment processing errors directly led to customer loss (Deloitte, 2024). For the situations above, the cost of a scoped engineer engagement is a fraction of the revenue risk of a broken billing system in production.
Quick Reference Table
| Integration Type | Method | Vibe Coding Friendly | Automation Required | Hire a Human? |
|---|---|---|---|---|
| One-time payment | Payment Link | Yes | No | No |
| Embedded checkout | Stripe.js via script | Platform-dependent | No | Sometimes |
| Subscriptions | Payment Link + Customer Portal | Yes | Yes (webhooks) | No |
| Stripe Connect (marketplace) | API-based | No | Yes | Yes |
| Metered billing | API-based | Partial | Yes | Recommended |
| PCI-sensitive custom forms | Custom Stripe Elements | No | Yes | Yes |
Frequently Asked Questions
Can I add Stripe to any vibe coded app without touching code?
Yes, for one-time payments and standard subscriptions. Stripe Payment Links requires zero code on any platform. For embedded checkouts, you need a platform that supports script injection or has a native Stripe component. Over 90% of no-code platforms in Stripe’s partner ecosystem support at least the Payment Link method natively (Stripe, 2024).
Do I need a developer to handle PCI-DSS compliance when using Stripe?
For most no-code apps, no. Stripe’s hosted checkout and Stripe Elements handle PCI DSS Level 1 compliance automatically — your app never touches raw card data. Businesses using a compliant hosted payment page are eligible for SAQ A, which is the shortest compliance self-assessment (PCI SSC, 2024). For apps that process card data directly, bring in an engineer.
How do I give users access to gated content after they pay?
Connect a Stripe webhook for payment_intent.succeeded to an automation in Zapier or Make. The automation updates the user’s record in your app database to mark them as a paying customer. Your app reads that field and shows or hides content accordingly. In imagine.bo, the Describe-to-Build feature can set up role-based access control from your initial prompt, so you’re connecting Stripe to an existing permission layer rather than building it from scratch.
What happens if Stripe flags my account or holds my payouts?
Stripe’s automated risk systems occasionally place holds on new accounts. Follow the account activation checklist above before processing live payments. Have your business registration documents, a clear website with a refund policy and contact information, and a realistic description of what you sell ready from day one.
Can a webhook fire more than once for the same event?
Yes. Stripe uses at-least-once delivery, so duplicate events are expected. Always implement idempotent handling — check the event ID before processing and skip duplicates. See the Idempotency section above for specific instructions for both no-code automation tools and custom endpoints.
Conclusion
Adding Stripe to a no-code app is within reach for any non-technical founder. One-time payments via Payment Links take under ten minutes. Subscriptions with a Customer Portal and webhook-driven automation take a focused afternoon.
Three things to take away:
First, use test mode to build your entire payment flow before switching to live — and when you switch, update every API key and webhook secret. Second, the Stripe Customer Portal is non-negotiable for subscription apps; without it, every billing change becomes a manual support ticket. Third, enable Smart Retries and automated failed-payment emails in your Billing settings on day one — it’s the highest-ROI thirty-second action for any subscription business.
imagine.bo handles Stripe integration as part of the Describe-to-Build workflow. Describe your payment model in plain English, and the AI-Generated Blueprint sets up the data structure for user roles, subscription status, and access control. Where the integration touches compliance or complex billing logic, Hire a Human connects you with a vetted engineer inside the same dashboard.
Start with the no-code tech stack for founders in 2026 to see how Stripe fits into the broader production-ready stack before you build.
Launch Your App Today
Ready to launch? Skip the tech stress. Describe, Build, Launch in three simple steps.
Build