The average funded startup spends $50,000 to $150,000 and four to eight months building a first product before a single paying customer validates whether the idea was worth building. According to CB Insights, 35% of startups fail because there is no market need for their product (CB Insights, 2023). Most of that money and time is spent before the founder gets the feedback that would have shaped a better product from the start. A no-code MVP changes that sequence entirely. You build the minimum version, put it in front of real users, collect real feedback, and iterate based on what you learn rather than what you assumed. According to Gartner, 70% of new applications will use no-code or low-code by 2025 (Gartner, 2021), and the fastest-growing segment is first-time founders using AI generation to compress the idea-to-deployed-product cycle from months to days. This guide covers the complete process for building a no-code MVP and launching faster than any traditional development path allows. For a direct comparison of AI-generation versus traditional no-code for MVP launches, this post on the AI vs no-code MVP guide for fast startup launches covers the strategic choice in detail.
TL;DR A no-code MVP built with imagine.bo goes from first prompt to deployed product in days, not months. The process: define the problem, scope the MVP to one core workflow, validate demand before building, write a specific prompt, review the AI-Generated Blueprint, deploy, and iterate on real feedback. According to CB Insights, 35% of startups fail from no market need (CB Insights, 2023). Building an MVP in days instead of months means you find out if the market exists before you spend significant capital finding out it does not.
What a No-Code MVP Actually Is (And What It Is Not)
An MVP is not a rough product. It is not a prototype. It is not “the full product but with fewer features.” An MVP is the minimum set of functionality that lets a specific person complete one specific valuable workflow and pay for the privilege of doing so. Everything else is Version 2.
Launch Your App Today
Ready to launch? Skip the tech stress. Describe, Build, Launch in three simple steps.
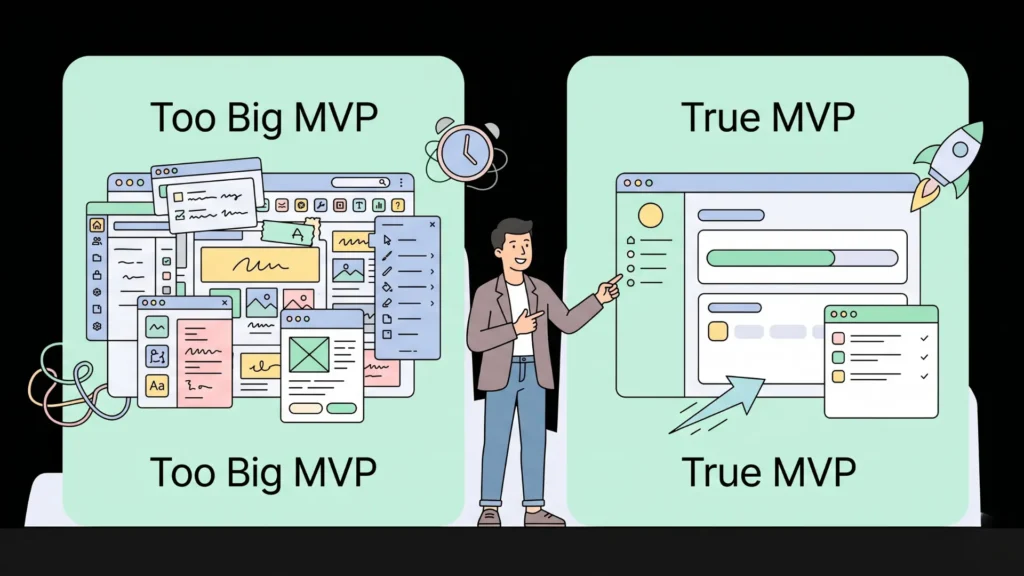
BuildThe confusion about what an MVP means is the primary reason most first MVPs are built too large. A founder who defines their MVP as “a project management tool for marketing teams” and builds twelve features has not built an MVP. A founder who defines it as “a way for a marketing team to see which campaigns are running and who owns each one, without digging through a spreadsheet” has a precise enough definition to build in three days.
The practical test for whether your MVP is correctly scoped is whether you can describe it in two sentences without using the word “also.” If you find yourself saying “and also users can…” after the first sentence, you have already exceeded MVP scope. Every “also” in your description is a feature that belongs in Version 2. The MVP that launches in three days with one workflow teaches you more in the first week of real user feedback than the MVP that launches in three months with eight workflows teaches you in the first three months.
For the full methodology behind MVP scoping and the validation feedback loop that tells you what to build next, this post on low-code MVP strategies and the validation feedback loop covers the decision framework in depth.
Step 1: Define the Problem with Precision
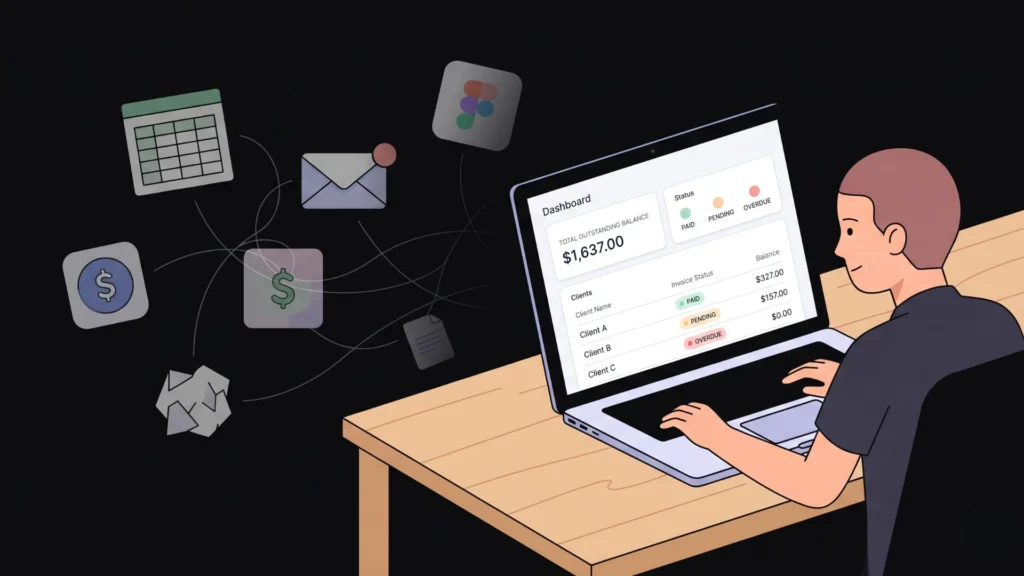
Every good MVP starts with a problem statement specific enough to generate a testable hypothesis. “Freelancers have trouble managing clients” is not a problem statement. “Freelance designers lose track of which clients have outstanding invoices because they use three different tools with no connection between them” is.
The difference matters because the precise problem statement maps directly to the MVP’s core workflow. If the problem is disconnected tools and lost invoice tracking, the MVP is a single screen where a designer can see all clients, their invoice status, and the total outstanding balance. That is one screen, one data model, and one clear test: do designers find enough value in that single view to pay for it?
Write your problem statement using this structure: [User type] has trouble with [specific action] because [specific cause]. The [specific cause] is where your MVP’s core value lives. Fix that cause with the minimum possible functionality and you have your MVP scope.
For a library of proven problem statements across twelve app categories that map directly to buildable prompts, this 40-prompt copy-paste library by app type provides structured starting points for the most common MVP types.
Step 2: Validate Demand Before You Build Anything
The most expensive mistake in early-stage product development is building before confirming that the problem is painful enough for real people to pay to solve it. Validation costs a day and $30 to $50 in ad spend. Building without validation costs weeks and thousands.
The three fastest validation methods in order of signal strength:
Pre-sale: Describe the product and collect payment before it exists. Stripe accepts payment for a product that does not exist. If ten people pay $29 for early access before you build anything, you have confirmation that the market exists. If nobody pays, you have saved yourself weeks of building the wrong thing.
Landing page with paid traffic: Build a one-page description of the problem and solution on Carrd or a simple HTML page in under an hour. Run $30 to $50 of targeted LinkedIn or Reddit ads to the right audience. A sign-up rate above 5% from targeted traffic is meaningful signal. Below 2% means the messaging or the audience targeting needs work.
Direct outreach to five people: Call or message five people who have the specific problem you identified. Ask them to walk you through how they currently solve it and what it costs them. If none of them describe the problem as significant enough to pay to fix, the problem is not painful enough to build for yet.
According to First Round Capital, startups that validate demand before writing code are four times more likely to reach initial commercial traction than those that build first (First Round Capital, 2022). That asymmetry alone justifies spending one day on validation before investing a week in building. For the full validation methodology including specific tools and the conversion benchmarks that indicate real signal, this post on validating startup ideas with no-code tools covers the process step by step.
Step 3: Write an MVP Prompt That Generates Accurately
With a validated problem and a scoped MVP, the prompt is the last step before building. The quality of the prompt determines the quality of the first generation. A good MVP prompt uses the four-element structure: Persona, Problem, Features, and Rules.
Persona: Name every user type with their operational context. Not “users” but “freelance graphic designers managing five to fifteen client projects simultaneously.”
Problem: One sentence on what the MVP solves. “Designers lose track of which clients have outstanding invoices when managing multiple projects across email and spreadsheets.”
Features: Every screen and function the MVP needs, specific enough to implement. Keep this to the absolute minimum. Three screens is a focused MVP. Ten screens is not an MVP.
Rules: Every access control boundary and edge case. “Designers can only see their own clients and invoices. Clients receive a read-only link to view their invoice. No client can access another client’s data.”
A complete MVP prompt for the freelance invoice tracker:
“Build a minimum viable product for freelance designers to track clients and invoices. Designers register with email and password. The dashboard shows all clients with name, email, project name, invoice status as draft, sent, or paid, and invoice amount. Designers can add a new client, create an invoice for a client with a title, amount, and due date, and update invoice status. The app sends a client an email with a read-only invoice link when status is changed to sent. Designers cannot see other designers’ clients or invoices. No client login required.”
That prompt generates the full MVP with the correct data model, the correct workflow, and the correct access logic on the first generation. For a detailed guide to prompt structure and the specific techniques that reduce correction rounds, this post on turning ideas into apps with AI prompts covers the four-element approach with worked examples.
Step 4: Review the Blueprint, Build, and Deploy
Submit the prompt to imagine.bo. The AI-Generated Blueprint appears before any code is written. Review it for three things: whether the database tables match the features you described, whether the user role separation is correct, and whether the page list covers every screen in your MVP workflow.
If anything is missing, use a follow-up prompt to correct it before confirming the build. A five-minute blueprint review prevents a multi-session correction cycle.
After confirming, generation takes three to eight minutes. Review the generated output by completing the core workflow as a first-time user. Fix gaps with targeted correction prompts: one issue, one prompt, then review. When the core workflow works correctly, click Deploy.
A solo founder building the freelance invoice tracker MVP on imagine.bo’s free plan at zero cost spends an estimated six to ten hours across two days from first prompt to deployed product tested with real users. The equivalent custom-built MVP at a freelance developer rate of $75 per hour and an estimated sixty to eighty hours of work costs $4,500 to $6,000 and takes four to six weeks. The cost difference is $4,500 to $6,000. The time difference is three to five weeks of additional market learning the no-code founder accumulates while the custom-built version is still in development.
One-Click Deployment sends your frontend to Vercel and your backend to Railway. SSL applies automatically. Your MVP is live and accessible to real users within minutes of clicking Deploy. For the technical details of what the deployment infrastructure provides, this post on building AI apps free and fast with Vercel covers the infrastructure layer.
Step 5: Get Real Users to Your MVP Within 48 Hours of Launch
The most common mistake after deploying an MVP is waiting for users to find it. Nobody finds it. You have to put it in front of people who have the problem you built the MVP to solve.
Five ways to get your first five users within 48 hours of launch, ordered by speed:
Direct message five people you identified during validation and tell them the product is live. This is the fastest path and the highest-quality first users because they already confirmed they have the problem.
Post in one relevant community: a Reddit thread, a Facebook group, a Slack workspace, or a LinkedIn post targeted at your exact user type. Do not post about your MVP. Post about the problem it solves and include the link in a comment.
Email the people who signed up on your validation landing page. They raised their hand as having the problem. The MVP is the thing they asked to see.
Ask five people to use it while you watch. This is a usability test, not a marketing exercise. Watch one person complete the core workflow without help. Write down every moment they hesitate or every question they ask. That observation is more useful than any analytics data in the first week.
Do not open paid advertising until you have learned from the first five organic users. Paid advertising optimises for scale. You are not ready to scale until you know the core workflow is clear enough for a new user to complete without guidance.
Citation capsule: According to Y Combinator’s published advice on early-stage product development, startups that get their first product to paying users within 90 days of deciding to build are significantly more likely to find product-market fit than those with longer development cycles, primarily because each week of real user interaction produces learning that weeks of internal testing cannot replicate (Y Combinator, 2023).
For the full playbook on going from side project to launched startup using no-code tools, this post on side project to startup: building a SaaS without code covers the launch and traction phase in detail.
Step 6: Iterate Based on What You Learn, Not What You Assumed
The purpose of the MVP is not to have a product. It is to learn what to build next. Every user session, every support question, every feature request, and every churned user tells you something your assumptions could not.
The iteration process on imagine.bo works through conversation. When a user tells you the invoice status is confusing, you describe the clearer version in a prompt: “Change the invoice status labels from draft, sent, and paid to unpaid, sent, and paid. Update the status badge colours to grey for unpaid, blue for sent, and green for paid.” That change deploys in the same session. The feedback-to-change cycle is hours, not sprints.
The user feedback pattern that most reliably indicates product-market fit is users trying to use the product for something you did not build it for. When a user messages asking if they can track multiple projects per client, they are telling you that the single project per client structure you built is not how they actually work. That is a signal worth building for. When a user asks for a feature that has nothing to do with the core workflow, that is a signal to ignore until the core workflow is strong. Distinguishing between those two types of feedback is the most valuable skill in early-stage product development.
When feature requests go beyond what conversational prompts handle reliably, the Hire a Human feature connects you with a vetted engineer at $25 per page. Complex integrations, custom business logic, and performance optimisation at scale all belong here. For a candid account of what the full MVP build and iteration cycle looks like for a first-time founder, this post on what founders learn from their first no-code MVP covers the real experience in detail.
FAQ
How long does it take to build a no-code MVP with imagine.bo?
A scoped MVP with one core workflow, two to three user types, and three to five screens typically reaches a deployed first version in two to four days of iterative building. This compares to four to eight weeks for a freelance-built equivalent at the same functional scope. According to Stripe, products that deploy to paying users within 90 days of starting development are four times more likely to reach $10,000 monthly recurring revenue (Stripe, 2023). The no-code path makes the 90-day window achievable even for solo founders with no technical background. This post on how to build a tech startup without a developer covers the full timeline and workflow.
What is the minimum credit cost to build an MVP on imagine.bo?
A basic MVP with three to five screens typically consumes three to six credits from first generation through final refinement. The free plan’s 10 credits per month are sufficient to build a complete scoped MVP and deploy it in a single month. More complex MVPs with multiple user roles, payment integration, and detailed admin views consume five to ten credits. The Pro plan’s 150 credits with rollover provide enough capacity for ongoing development through multiple feature additions without credit top-up purchases.
Should I charge for my MVP from day one?
Yes, for most product types. A free MVP attracts users who want a free product. A paid MVP attracts users who have the problem and value the solution. The signal quality difference is significant. According to Stripe’s research on early-stage SaaS, startups that begin charging within the first 90 days of product launch retain 40% more of their initial user base at the 12-month mark compared to those that delay monetisation past six months (Stripe, 2023). Charging early forces you to articulate value clearly and creates the revenue that funds the next iteration. For the full monetisation strategy for prompt-built apps, this post on monetising prompt-built apps without coding covers pricing approaches and implementation.
How do I know when my MVP is ready to launch?
When the core workflow works correctly end-to-end and you are not embarrassed to share the URL with someone who has the problem you built it to solve. Not when every edge case is handled. Not when the design is perfect. Not when you have added all the features on your roadmap. An MVP that is 80% right and live teaches you more in one week than an MVP that is 100% right and still in development teaches you in three months. The standard for launch is “good enough to learn from,” not “good enough to scale.”
Conclusion
A no-code MVP compresses the idea-to-market cycle from months to days and from five-figure costs to the price of a Pro plan subscription. The process has six steps: define the problem precisely, validate demand before building, write a specific four-element prompt, review the AI-Generated Blueprint before confirming, deploy and get real users within 48 hours, and iterate based on what those users tell you.
The most common reason this process fails is scope creep before launch. An MVP that grows to fifteen features before the first user tests it is not an MVP anymore. It is a product built on assumptions, and assumptions are what the MVP is supposed to eliminate.
imagine.bo’s free plan provides 10 credits to build and deploy your first version at zero cost. The Pro plan at $25 per month adds 150 rollover credits, private projects, and a one-hour expert pre-launch session. Start with your most precisely defined problem, write the minimum description that generates the core workflow, and deploy before the week is out. For the practical step-by-step walkthrough of a complete MVP build from blank page to launched product, this post on building your MVP: a step-by-step guide covers every phase of the process.
Launch Your App Today
Ready to launch? Skip the tech stress. Describe, Build, Launch in three simple steps.
Build